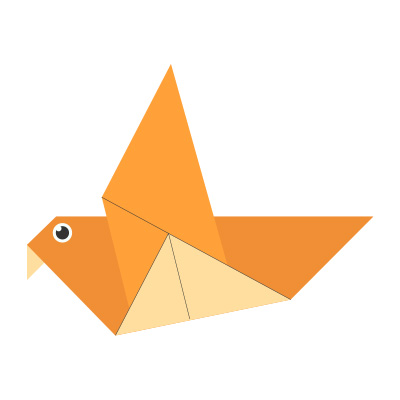
Origami Paper Seagull Easy 13 Step by Step
Looking for a fun and relaxing paper craft project? This origami paper seagull easy 13 step by step guide is perfect for beginners and origami lovers of all ages. Whether you want to decorate your room, make an ocean-themed mobile, or just enjoy folding paper, this tutorial will teach you how to fold a beautiful paper seagull using just one sheet.
In this article, we’ll cover:
- The materials you need
- The benefits of learning origami
- A simple 13-step guide to make your own paper seagull
- Bonus tips for customizing your seagull
Let’s spread our wings and dive in!
Why Try Origami?
Origami, the ancient Japanese art of paper folding, offers more than just fun. Here are a few reasons why it’s worth learning:
- Stress Relief: Folding paper helps calm the mind and focus attention.
- Improves Focus: Origami builds patience and concentration skills.
- Eco-Friendly Hobby: All you need is a square sheet of paper—no glue, tape, or scissors required.
- Creative Expression: You can use colors, textures, and decorations to personalize your designs.
Now let’s start creating your very own origami paper seagull!
Materials You’ll Need
Before we begin, gather the following:
- 1 square sheet of origami paper (15 cm x 15 cm or 6 in x 6 in)
- Optional: Markers or colored pencils for decorating
- A clean, flat surface for folding
White or gray paper works best to resemble a real seagull, but feel free to get creative with colors.
Origami Art and Craft Materials on Amazon
Origami Paper Seagull Easy 13 Step by Step
Step 1: Start with the colored side down
Place your origami paper colored side down, white side facing up. This will be the base of your seagull.
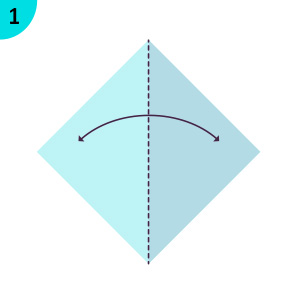
Step 2: Fold diagonally
Fold the paper in half diagonally to form a triangle. Crease well and unfold.
Step 3: Fold diagonally again
Now fold along the other diagonal. You’ll have an “X” crease across your square.
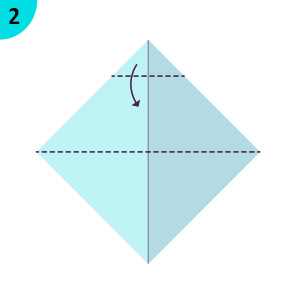
Step 4: Fold horizontally
Fold the paper in half horizontally to make a rectangle. Crease and unfold.
Step 5: Fold vertically
Fold vertically to form another rectangle. Crease and unfold.
Now you should have creases forming both a “+” and an “X” on your paper.
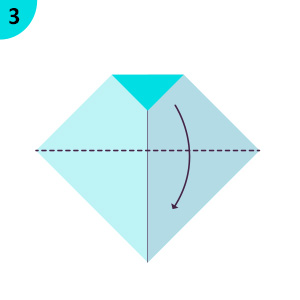
Step 6: Collapse into a square base
Pinch the corners inward using the creases you’ve made. Collapse the paper into a smaller square base with the open ends at the bottom.
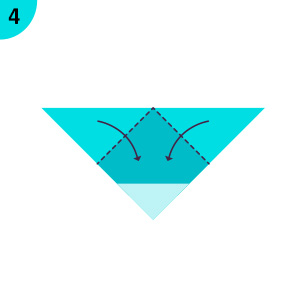
Step 7: Fold side edges to the center
Take the right and left corners of the top layer and fold them inward to meet the center crease. This forms a kite shape.
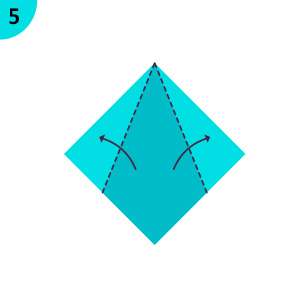
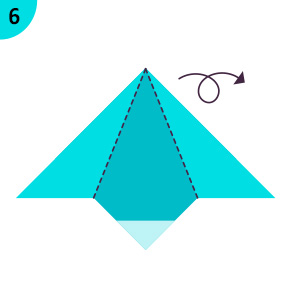
Step 8: Fold the top triangle down
Fold the small triangle at the top (above your kite shape) downward. Then unfold this and the two side flaps from the previous step.
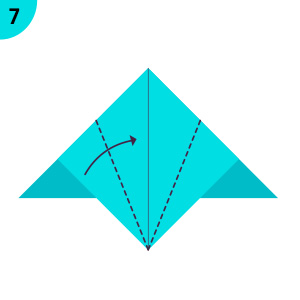
Step 9: Open the flap into a petal fold
Lift the top layer at the bottom point and open it upward, reversing the creases to form a diamond shape. This is called a petal fold.
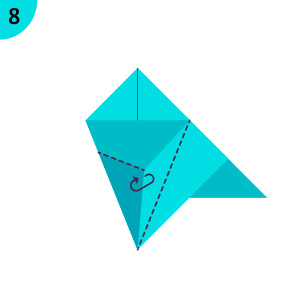
Step 10: Repeat on the back side
Flip the model over and repeat steps 7 to 9 on the other side to complete the base for your seagull’s wings.
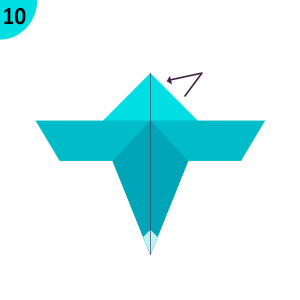
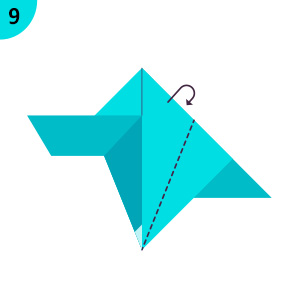
Step 11: Shape the wings
Fold both top layers out to the sides diagonally to create long wings. You now have the general shape of a seagull.
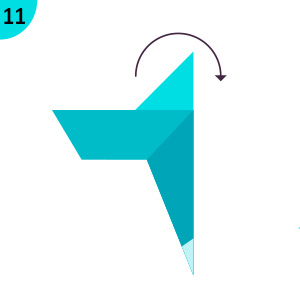
Step 12: Form the tail
Fold the bottom point up behind the wings slightly. This will be your seagull’s tail.
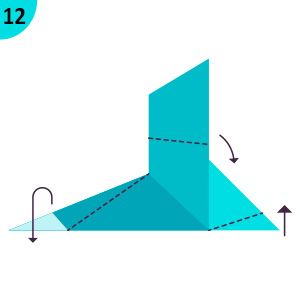
Step 13: Make the head
Choose one wing tip and gently fold it downward to form the seagull’s head and beak.
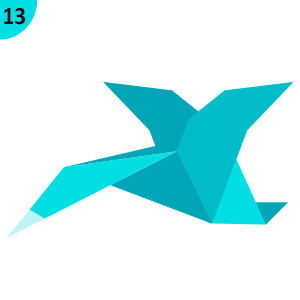
Congratulations! You’ve completed your origami paper seagull easy 13 step by step. Admire your creation or make a whole flock!
Bonus Tips for a Beautiful Origami Seagull
Want to take your origami to the next level? Try these ideas:
- Add eyes using a marker or small stickers
- Use gradient paper to give your seagull a natural, wind-blown look
- Make a mobile by hanging several seagulls with thread
- Use different paper sizes to create a family of birds
Final Thoughts
This origami paper seagull easy 13 step by step tutorial shows how a simple piece of paper can transform into a graceful bird with just a few folds. It’s a fantastic activity for kids, adults, students, and crafters looking for a creative break.
Origami is more than just folding, it’s mindfulness, creativity, and satisfaction all rolled into one. With this easy guide, you’re well on your way to mastering more paper animals and expanding your origami skills.
Happy folding!