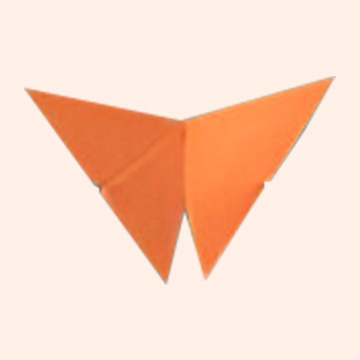
How to Make an Easy Origami Butterfly: Step-by-Step Instructions (12 Steps)
Materials Needed
- A rectangular sheet of paper (standard A4 or letter size works well)
- Flat surface for folding
Where to Buy?
🛒 Get the Best Deal on Amazon:
Step 1: Start with a Square Sheet of Paper

Place the paper color side down (if one side is colored). Ensure it is perfectly square for symmetrical folds.
Step 2: Fold Diagonally (Both Ways)
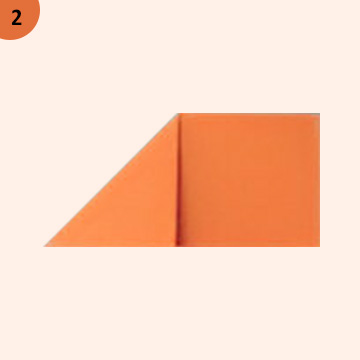
Fold the paper diagonally from one corner to the opposite corner. Crease well and unfold. Repeat with the other two corners. Now, you should see an “X” crease across the paper.
Step 3: Fold Horizontally and Vertically
Fold the paper in half horizontally and vertically. This will leave you with a “+” fold that intersects the previous “X.” Unfold after each fold.
Step 4: Collapse into a Triangle (Preliminary Base)
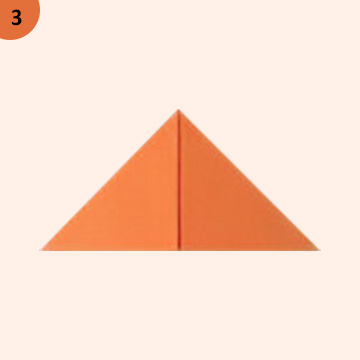
Using the creases, bring the corners together to form a triangle (this is also known as a waterbomb base). Push the sides inward while bringing the top corners down to meet at the bottom. Flatten the triangle shape.
Step 5: Fold the Triangle in Half
Take the triangle and fold it in half from left to right, aligning the corners. This will help form the center of your butterfly.
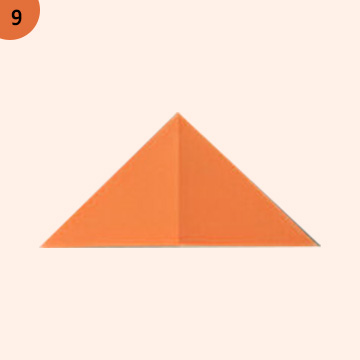
Step 6: Fold the Top Layers Up
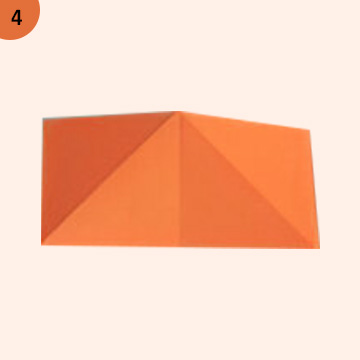
Now, take the top layer from each side and fold it up so the corners meet at the top point of the triangle. It will resemble a diamond shape.
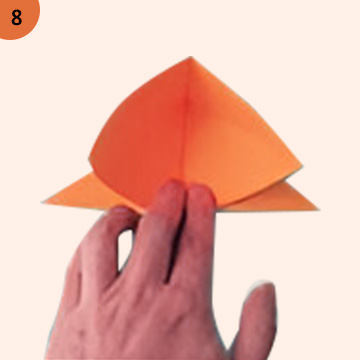
Step 7: Flip Over and Fold the Bottom Point Up
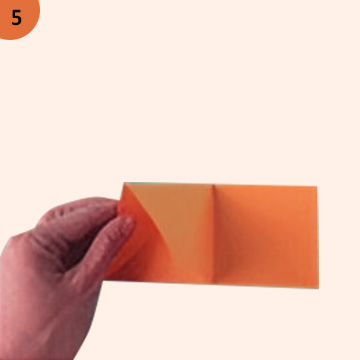
Turn the entire model over. Fold the bottom point (the triangle’s tip) up so it goes slightly over the top edge. This step starts to shape the butterfly’s body.
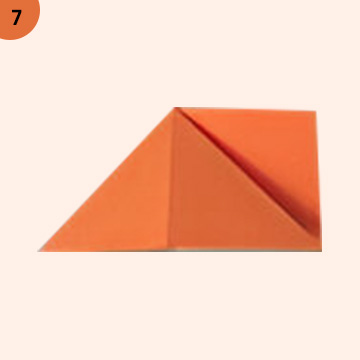
Step 8: Fold the Model in Half Vertically
Fold the entire model in half vertically (like closing a book), keeping the folded flaps outside. This starts giving your butterfly a 3D shape.
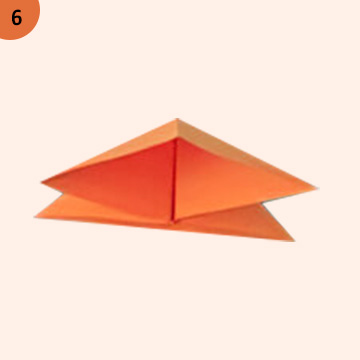
Step 9: Fold the Wings Down
Hold the model vertically. Fold the top flaps down on both sides so they resemble wings. These folds are diagonal and should go slightly below the bottom edge of the body.
Step 10: Sharpen the Folds
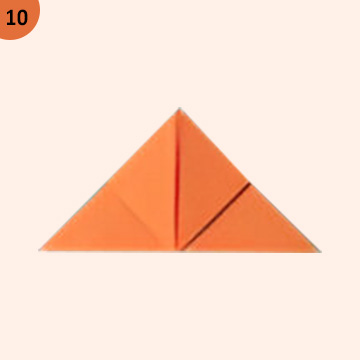
Use your fingers (or a ruler/bone folder) to sharpen all the folds. This ensures the wings keep their shape and the butterfly stays firm.
Step 11: Adjust the Wings for Shape
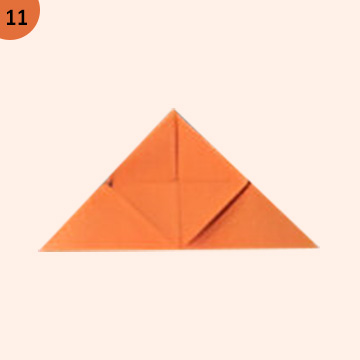
Gently pull the wings outward and curve the edges slightly to make them look natural and elegant. You can customize the angle depending on how you want your butterfly to sit.
Step 12: Done! Your Origami Butterfly is Ready
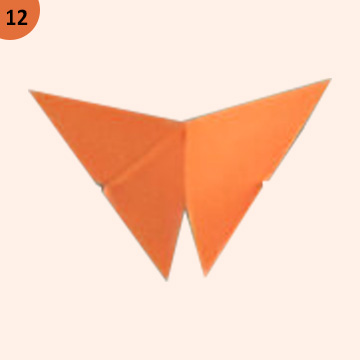
Congratulations! You’ve just made a beautiful origami butterfly in 12 easy steps. Display it on your desk, glue it on a card, or string a few together to make a hanging mobile.
Tips for Making the Best Origami Butterfly
- Use thinner paper for crisp folds and a more delicate look.
- Experiment with colors and patterns to suit your theme or purpose.
- Make multiple butterflies in various sizes to create a butterfly wall or hanging display.
- Practice makes perfect – don’t worry if your first few attempts aren’t perfect!
Creative Uses for Origami Butterflies
Now that you’ve learned how to make an easy origami butterfly in 12 steps, here are some fun ways to use them:
- Gift Toppers – Add them to wrapped presents for a handmade touch.
- Wall Decor – Stick several butterflies on a wall for an eye-catching pattern.
- Bookmarks – Slide them onto a book corner for a cute bookmark.
- Party Decorations – Use colorful paper butterflies to decorate tables or hang from ceilings.
- Greeting Cards – Glue them to the front of handmade cards.
Frequently Asked Questions
Q: Can kids make this origami butterfly?
A: Yes! This 12-step origami butterfly is beginner-friendly and perfect for kids aged 6 and up with adult supervision.
Q: What paper is best for origami butterflies?
A: Origami paper (kami) is ideal, but any lightweight paper like printer paper or colored craft paper cut into a square works fine.
Q: Can I make this butterfly bigger or smaller?
A: Absolutely! Just start with a larger or smaller square depending on your needs. For tiny butterflies, try a 7.5cm x 7.5cm sheet.
Conclusion
Learning how to make an easy origami butterfly step by step (12 simple steps) is a rewarding and relaxing craft that anyone can enjoy. With just a square piece of paper and a few minutes of your time, you can create a beautiful piece of art that brings joy, color, and creativity into your space.
Whether you’re decorating your room, crafting with your kids, or adding a handmade touch to your gifts, this origami butterfly is the perfect project. Now that you know how to do it, go ahead, fold, shape, and flutter your way into the magical world of origami!