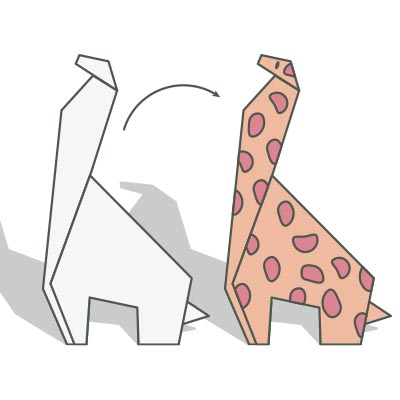
How To Make An Easy Origami Giraffe – 13 Step-by-Step Instructions
Origami is a beautiful and calming paper-folding art that allows you to create intricate figures using just a sheet of paper. One of the most delightful and whimsical creations is the origami giraffe, a simple project perfect for beginners and kids alike. In this guide, you’ll learn how to make an easy origami giraffe in 13 step-by-step instructions. No previous experience is needed; follow along and enjoy the process!
What You Need to Get Started
Before we dive into the steps, here’s what you need:
- One square sheet of origami paper (preferably 6×6 inches)
- A flat surface
- Optional: A marker or pen for drawing eyes or spots on your giraffe
That’s it! Now, let’s jump into folding your own adorable origami giraffe.
Origami Art and Craft Materials on Amazon
Step-by-Step Guide: How To Make An Easy Origami Giraffe
Step 1: Start with a Square Paper
Place your origami paper colored side down (if it has one). A square sheet is essential to ensure proportional folds.

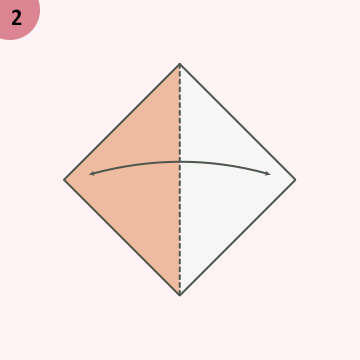
Step 2: Fold Diagonally
Fold the square diagonally from one corner to the opposite corner to form a triangle. Crease sharply and unfold.
Step 3: Fold the Opposite Diagonal
Now, fold along the other diagonal and crease well. Unfold again. You should see an “X” crease pattern on your paper.
Step 4: Fold the Paper in Half Horizontally
Now fold your paper in half horizontally (top edge to bottom edge) to form a rectangle. Crease and unfold.

Step 5: Fold Vertically
Repeat the previous step vertically by folding the left edge to the right edge. Crease and unfold.
Now your paper should show a star-like crease pattern, with both diagonals and midlines.
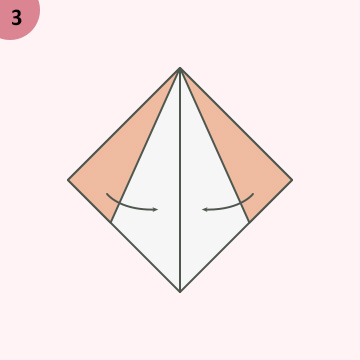
Step 6: Bring the Corners Together
Hold the left and right corners of your paper and push them inward. The paper should naturally collapse into a smaller square, also known as a preliminary base.
Step 7: Fold the Lower Edges to the Center
Take the bottom left and bottom right edges of the square and fold them toward the center crease, forming kite-like shapes.
Step 8: Fold the Top Triangle Down
Fold the top triangular flap down along the top edges of the folds from the previous step. This will help lock the folds in place.
Step 9: Unfold and Collapse into a Kite Base
Unfold the last three folds. Lift the top layer of the bottom point and bring it up, allowing the sides to collapse inward along the creases. Flatten into a diamond or kite shape.
Step 10: Flip and Repeat on the Other Side
Turn the model over and repeat Steps 7 to 9 on the other side. You should now have a kite base on both sides.
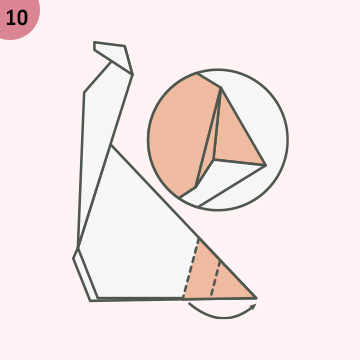
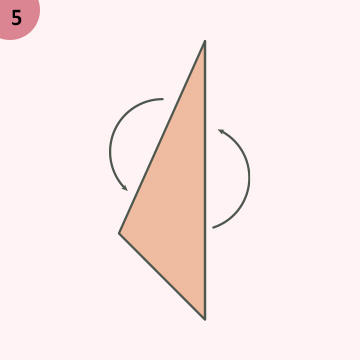
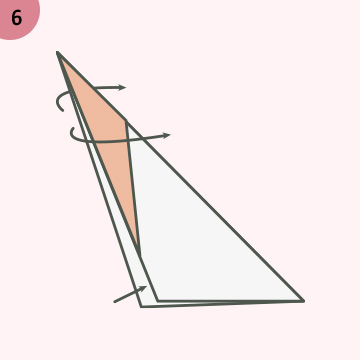
Step 11: Form the Neck and Tail
Rotate your model so that the point is facing up. Take one of the side flaps (preferably the left one) and fold it diagonally inward to create the giraffe’s neck. Then, take the opposite flap and fold it slightly downward to form the tail.
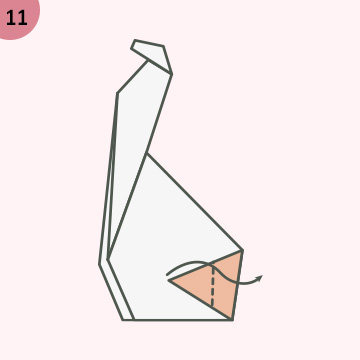
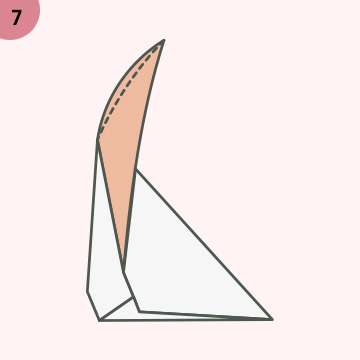
Step 12: Shape the Head
To form the giraffe’s head, fold the top of the neck backward to create a bend. You can also make a small reverse fold at the top to form the giraffe’s head and ears.
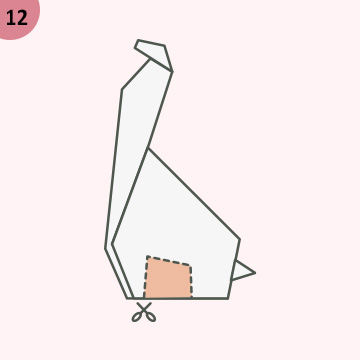
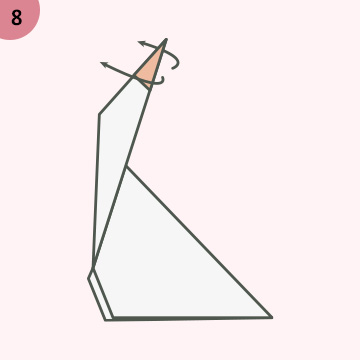
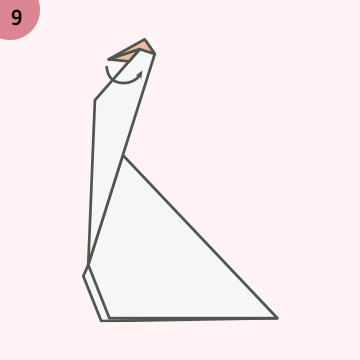
Step 13: Add Details
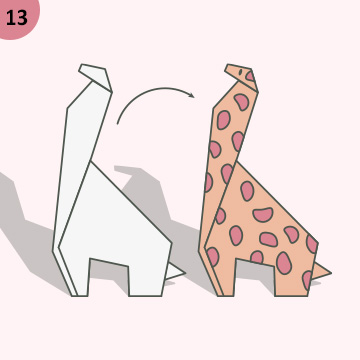
Your origami giraffe is almost complete! Use a marker or pen to add eyes, spots, or a smile. You can also slightly adjust the folds to make your giraffe stand upright or give it a more dynamic pose.
Bonus Tips for Origami Beginners
If you’re new to origami, here are some helpful tips to make the process smoother:
- Use thinner paper for easier folds.
- Crease sharply with a fingernail or ruler edge.
- Practice with scrap paper before using decorative sheets.
- Watch video tutorials if you’re a visual learner.
Making mistakes is part of the learning process in origami. Don’t worry if your first giraffe isn’t perfect. With a little practice, you’ll soon be folding with confidence.
Why Origami Giraffes Are Great for Kids
This 13-step origami giraffe is a great activity for kids. It teaches:
- Fine motor skills
- Patience and focus
- Spatial awareness
- Creative thinking
It’s also a screen-free, budget-friendly craft that children can enjoy alone or with friends. Try using different paper colors or decorating the giraffes with glitter, stickers, or patterns to add a personal touch!
Creative Uses for Your Origami Giraffe
Wondering what to do with your origami giraffe once it’s complete? Here are a few fun ideas:
- Classroom decor or craft projects
- Bookmarks
- Gift toppers or handmade cards
- DIY safari animal display
- Party decorations for jungle-themed events
The possibilities are endless. Making a family of origami animals is also a great project for a rainy day or group activity.
Final Thoughts
Learning how to make an easy origami giraffe in 13 step-by-step instructions is a rewarding and enjoyable experience. Whether you’re a beginner or just looking for a relaxing craft, this project is simple yet satisfying.
The charm of origami lies not just in the finished product but in the mindfulness of the process itself. So grab a sheet of paper, follow these steps, and fold your way to a cute, creative giraffe today!
SEO Keywords Used:
- how to make an easy origami giraffe
- origami giraffe step-by-step
- easy origami for beginners
- origami giraffe tutorial
- 13 step origami giraffe


