
How To Make An Easy Origami Mouse: 14 Step-by-Step Instructions
Are you fascinated by the art of paper folding? Origami is a fun, creative, and relaxing craft that transforms a simple sheet of paper into intricate designs. If you’re a beginner or simply looking for an enjoyable DIY activity, learning how to make an easy origami mouse is a great place to start. In this article, we’ll guide you through 14 simple step-by-step instructions to create your own adorable origami mouse. No special tools required, just a square piece of paper and a few minutes of your time!
What You’ll Need
Before we jump into the steps, gather the following:
- One square sheet of origami paper (preferably 6×6 inches)
- A flat surface
- Optional: A black pen for drawing eyes and nose
That’s it! Now let’s begin.
Origami Art and Craft Materials on Amazon
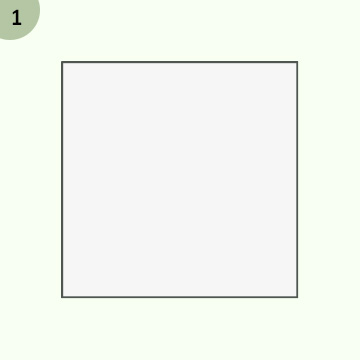
Step 1: Start with the Colored Side Down
Place your origami paper color-side down (if using colored paper). The white side should be facing up. Position the paper so it looks like a diamond, one corner pointing toward you.
Step 2: Fold the Paper in Half Diagonally
Fold the bottom corner to meet the top corner to form a triangle. Crease the fold well and then unfold. This gives you a center crease that will help align future folds.
Step 3: Fold in Half Diagonally the Other Way
Now fold the left corner over to the right corner, forming another triangle. Crease well and unfold. You should now see an “X” crease on your paper.

Step 4: Fold the Bottom Corner to the Center
Take the bottom corner and fold it up so it meets the center of the “X”. Press down the fold firmly.

Step 5: Fold the Top Corner Down to the Bottom Edge
Now take the top corner and fold it down until it touches the bottom edge of the paper. This forms a kite-like shape.
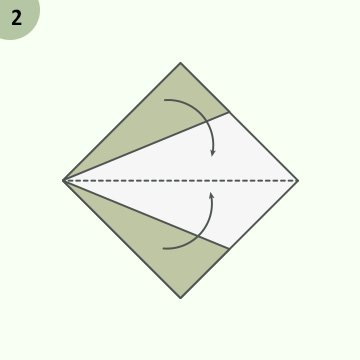
Step 6: Fold the Right Corner to the Center Line
Take the right corner of the paper and fold it inward so the edge lines up with the center crease. Repeat the same with the left corner. You should now see a diamond shape.
Step 7: Flip the Paper Over
Gently turn the paper over to the other side. The flat side should be facing up now.

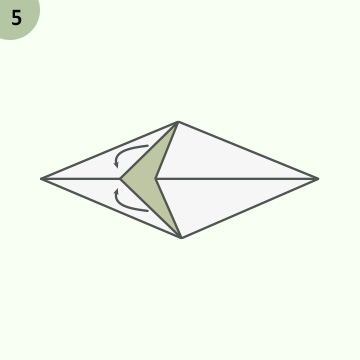
Step 8: Fold the Bottom Point Up Slightly
Take the bottom tip and fold it upward about half an inch. This forms the mouse’s nose.

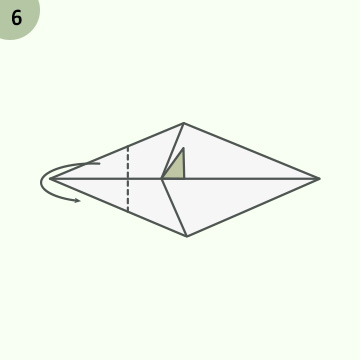
Step 9: Fold the Paper in Half Vertically
Fold the entire model in half vertically (left edge over to the right edge), so the kite shape turns into a triangle again. Make sure the small nose flap is on the outside.

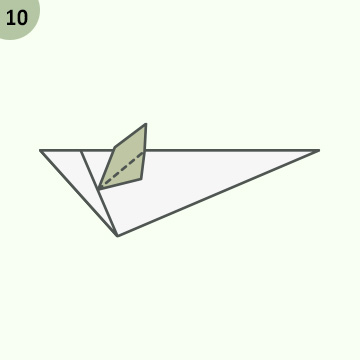
Step 10: Form the Mouse’s Head
At the narrow point of the triangle (opposite the base), fold a small triangle down. This will become the mouse’s head and nose tip.
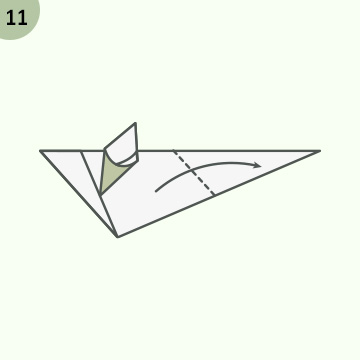
Step 11: Create the Ears
To make the ears, lift the top flaps slightly on both sides of the folded triangle and fold small triangles outward. These should be evenly shaped and positioned near the mouse’s head.
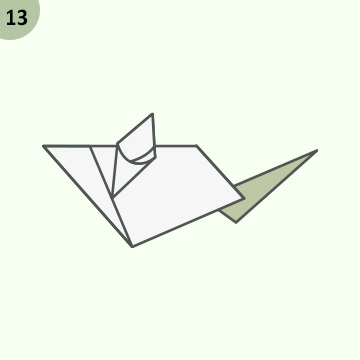
Step 12: Fold the Tail
Go to the opposite end of the mouse (the wide base). Fold a small section upward to create the tail, angling it slightly for a natural look.

Step 13: Shape the Body
Gently press the body and adjust the folds to give the mouse a more 3D appearance. You can puff it up slightly if you want your mouse to stand or look more realistic.
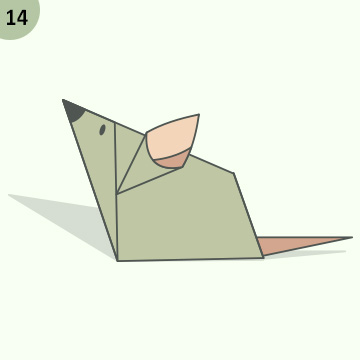
Step 14: Add Final Details
Use a pen or marker to draw the mouse’s eyes and nose. You can even color in the ears for added charm!
Tips for Success
- Use thin origami paper — it folds easily and holds creases better than regular paper.
- Be precise with each fold. Origami is all about symmetry and accuracy.
- Don’t worry if your first mouse isn’t perfect. Practice makes perfect!
- You can use different colors or patterns to create a family of mice.
Fun Ways to Use Your Origami Mouse
Once you’ve mastered this easy origami mouse, there are plenty of creative ways to enjoy your creation:
- Decorate your desk or bookshelf: Add a whimsical touch to your workspace.
- Use as a gift topper: Personalize a wrapped present with a handmade mouse.
- Educational activity: Teach kids about shapes, symmetry, and following instructions.
- Create a story scene: Make a few mice and combine with other origami animals for a playful diorama.
Why Origami is a Great Hobby
Origami isn’t just an art form, it’s also beneficial for your brain and well-being. Here’s why you might want to do more of it:
- Boosts concentration and memory
- Improves fine motor skills
- Reduces stress and anxiety
- Promotes mindfulness and patience
- Offers a sense of achievement
Best of all, it’s inexpensive and portable. You can practice origami anywhere, anytime.
Conclusion
Learning how to make an easy origami mouse is a rewarding and enjoyable activity for crafters of all ages. With these 14 step-by-step instructions, even beginners can successfully fold a cute paper mouse in just a few minutes. Whether you’re crafting for fun, relaxation, or creative decoration, this little mouse is sure to bring a smile to your face.
So grab a square of paper and give it a try, your first origami mouse is only a few folds away!
how to make an easy origami mouse, origami mouse step by step, origami for beginners, paper mouse instructions, DIY origami animals, easy origami guide


