How To Fold An Origami Fly – Folding Instructions (8 Steps)
Origami is a beautiful and relaxing art form that allows you to create intricate shapes using just a single sheet of paper. If you’re looking for a fun and simple project, learning how to fold an origami fly is a great place to start. This guide provides easy-to-follow, step-by-step instructions to help you craft a realistic-looking paper fly.
Whether you’re a beginner or an experienced folder, this 8-step tutorial will walk you through the entire process. Let’s get started!
Materials Needed
Before you begin, gather the following:
- 1 square sheet of origami paper (6×6 inches works well)
- A flat, clean surface
- (Optional) A ruler or bone folder for crisp folds
Where to Buy?
🛒 Get the Best Deal on Amazon:
Step-by-Step Instructions to Fold an Origami Fly
Step 1: Start with the Colored Side Down
Place your square paper on a flat surface with the colored side facing down. This ensures that the fly’s body will have a clean, uniform look.
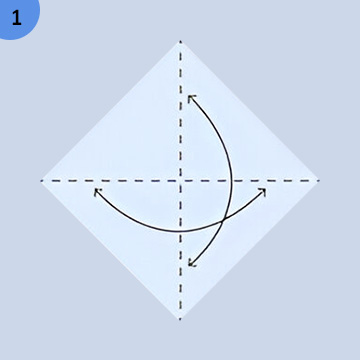
Step 2: Fold Diagonally to Form a Triangle
Fold the paper in half diagonally, bringing one corner to the opposite corner. Crease well and unfold. Repeat the fold in the opposite direction to create an “X” crease.
Step 3: Form a Square Base
Flip the paper over and fold it in half horizontally. Unfold, then fold it vertically. Push the sides inward to collapse the paper into a square base (also called a preliminary fold).
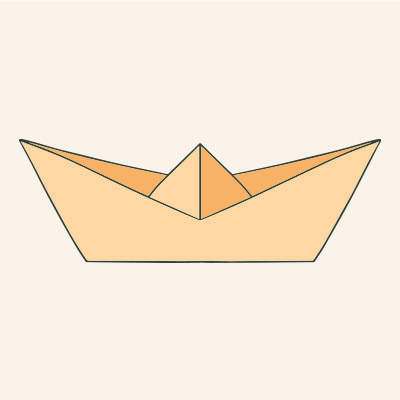
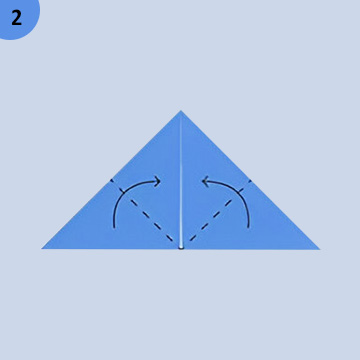
Step 4: Fold the Side Flaps Upward
With the open end facing downward, take the left and right flaps and fold them upward, aligning them with the top corner. This will form a kite shape.
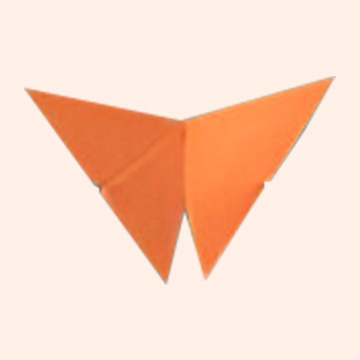
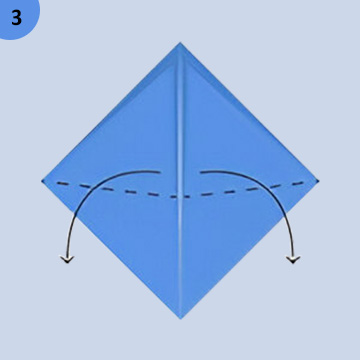
Step 5: Create the Wings
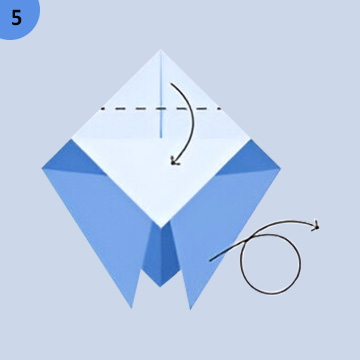
Fold the top layer of the left and right flaps back down at a slight angle to form the fly’s wings. Ensure both sides are symmetrical for balance.
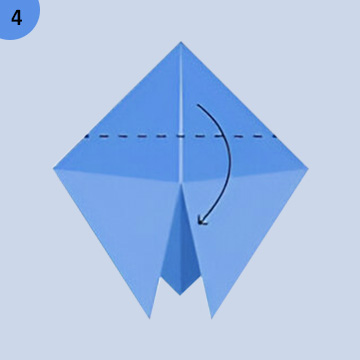
Step 6: Shape the Head and Body
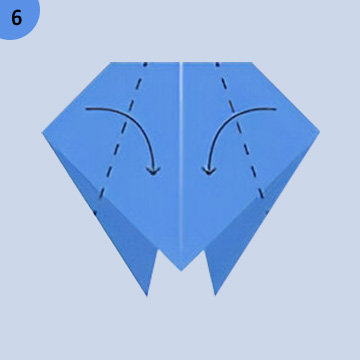
Fold the top point downward to form the fly’s head. Then, make a small reverse fold to tuck the tip inside, giving the head a rounded appearance.
Step 7: Add Details (Optional)

For a more realistic look, you can:
- Use a pen to draw eyes on the head.
- Gently curl the wings upward for a 3D effect.
Step 8: Final Adjustments

Flatten the model lightly and adjust the wings and body as needed. Your origami fly is now complete!
Tips for Success
✔ Use thin paper for easier folding.
✔ Crease sharply for clean, defined edges.
✔ Practice patience if it doesn’t turn out perfectly the first time, try again! How to Make an Easy Origami Envelope
Conclusion
Folding an origami fly is a quick and enjoyable project that enhances your paper-folding skills. With just 8 simple steps, you can create a fun and lifelike insect.
Want more origami ideas? Try making a butterfly, crane, or frog next!
Happy folding! 🪰✂️