Origami, the Japanese art of paper folding, is a fun and creative activity for all ages. One of the simplest and most iconic origami designs is the paper boat. Whether you’re a beginner or looking for a quick craft project, this step-by-step guide will help you make an easy origami paper boat in just a few minutes.
Materials Needed
- A rectangular sheet of paper (standard A4 or letter size works well)
- Flat surface for folding
Where to Buy?
🛒 Get the Best Deal on Amazon:
Step-by-Step Instructions to Make an Origami Paper Boat
Step 1
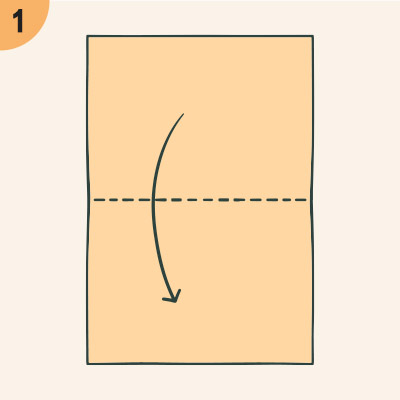
To begin, keep the rectangle in portrait format in front of you, i.e., laid tall rather than wide. Fold the paper down in half, making it half as tall.
Step 2
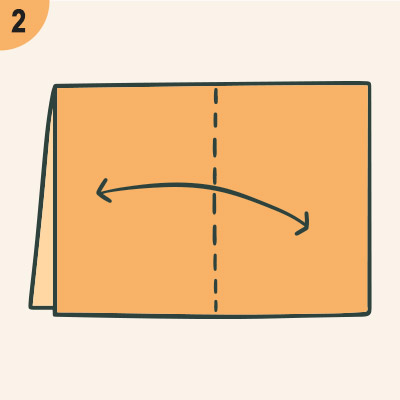
Next, you should fold it in half again along the width of the sheet. That’s 4 layers of paper, so be careful to make a neat crease.
Step 3
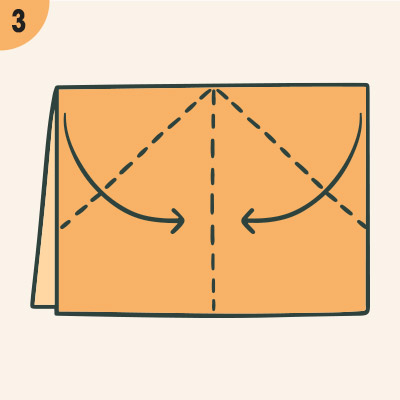
Open up the last fold and now fold down one half of the top folded edge down towards the central crease. It will form a triangle like this.
Step 4
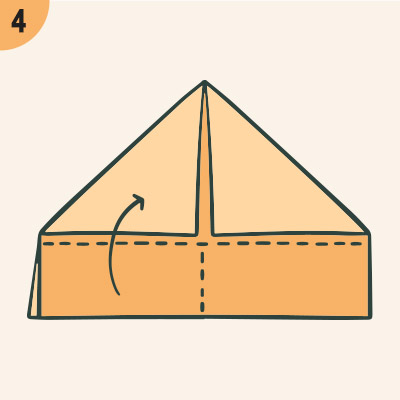
Mirror the same fold on the other half, and you’ll create this peak or point at the top of your paper.
Step 5
The model now has two loose layers of paper towards the bottom. Lift the top layer and fold it inwards. Turn the model over and do the same with the bottom flap of the paper again.
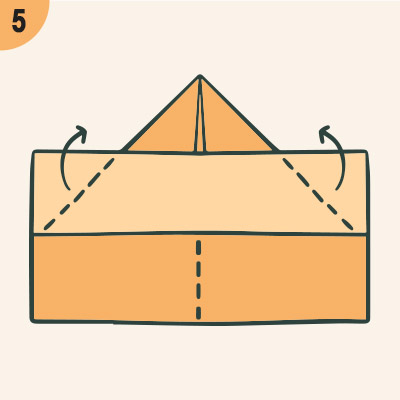
Step 6
The model is now almost a perfect triangle except for these extra corners at the bottom. Fold the extra bits over the sides of the thick triangle, and repeat from the other side. Now you have a perfect triangle with a hollow bit at the bottom.
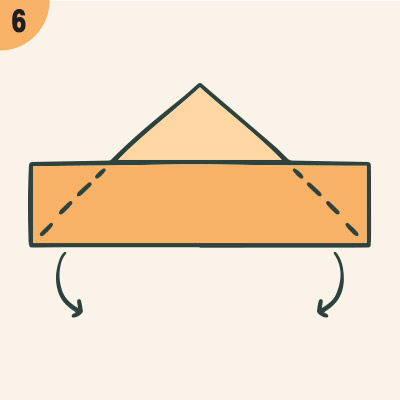
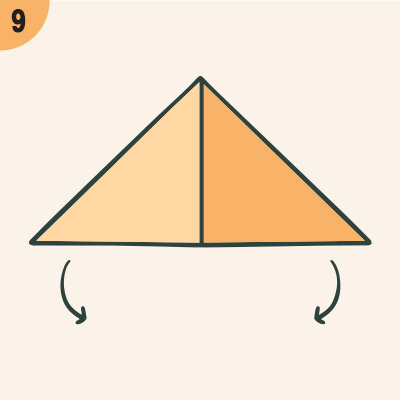
Step 7
Open up the hollow gaps and bring the two sides’ corners of the triangle flat together like this. Fold the rest of it flat to form this small square.
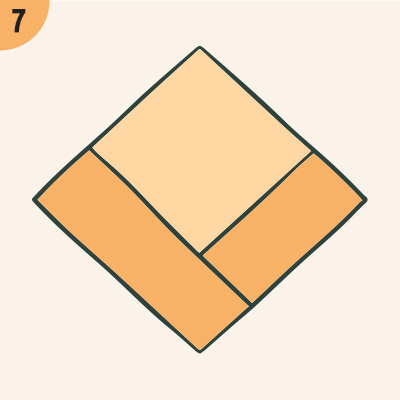
Step 8
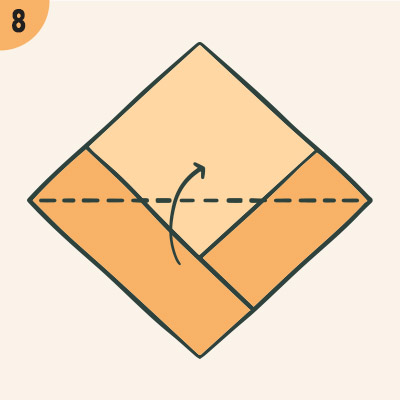
The square still has a hollow area inside, and one end has two free corners. Hold one of them to the opposite corner like this to form a small triangular shape.
Step 9
Turn the model over and repeat with the remaining free corner.
Step 10

You now have a smaller triangle with a hollow area inside. Like before, open this up and fold it to fit into a smaller square.
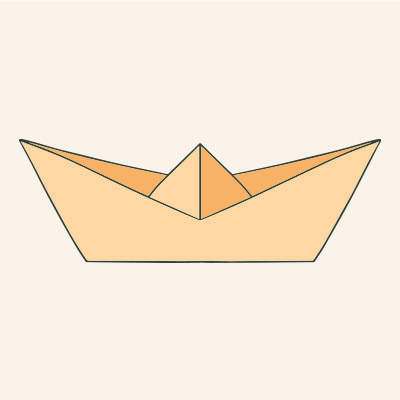
Step 11
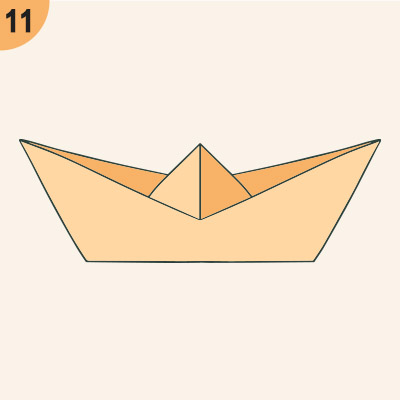
Could you open up the boat model? It should look like this, with a triangular shape sticking out from the middle.
That triangular shape is hollow and can be opened up from the bottom. Pull it apart a little to make the boat more stable. It will also help it float on water without tipping over.
Your boat is done. Try it out!
Tips for a Perfect Origami Boat
✔ Use thin, crisp paper for easier folding.
✔ Make sharp creases for a sturdy boat.
✔ Decorate your boat with markers or stickers for a personalized touch.
Final Thoughts
Making an origami paper boat is a simple yet satisfying craft. With just a few folds, you can create a floating masterpiece perfect for play or decoration. Try making different sizes and experiment with waterproof paper for real water use!
Now that you know how to make an easy origami paper boat, why not try more origami projects? Happy folding! �⛵