How To Make An Easy Origami Bus – 8 Step-by-Step Instructions
Origami is an age-old Japanese art that transforms simple sheets of paper into intricate models without the use of scissors or glue. If you’re looking for a fun, easy, and educational craft for kids or beginners, learning how to make an origami bus is a great start. This paper bus model is perfect for school projects, home decor, or just to spark creativity in young minds. In this guide, we’ll walk you through 8 simple steps to make an easy origami bus, using only a square piece of paper.
Why Choose Origami for Kids?
Before we dive into the step-by-step instructions, let’s look at why origami is so beneficial:
- Enhances fine motor skills
- Improves concentration and memory
- Teaches patience and precision
- Encourages imagination and creativity
- Eco-friendly activity – only paper is required
Whether you’re a parent, teacher, or craft enthusiast, this origami bus tutorial is the perfect mix of fun and learning.
What You’ll Need
To make an origami bus, you’ll need:
- One square piece of paper (preferably yellow or any bus-like color)
- A flat surface to fold on
- Markers or pens for decorating (optional)
Now let’s get into the exciting part, folding your very own origami bus!
Origami Art and Craft Materials on Amazon
How To Make An Easy Origami Bus – 8 Step-by-Step Instructions
Step 1: Start with a Square Paper
Place your square paper flat on the table. If the paper has a colored side, start with the colored side facing down. This will be the exterior of your origami bus.

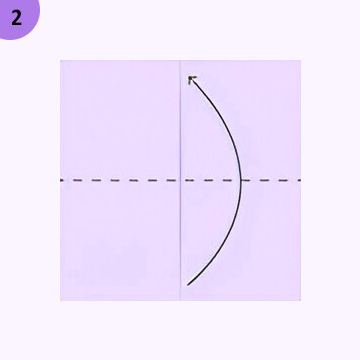
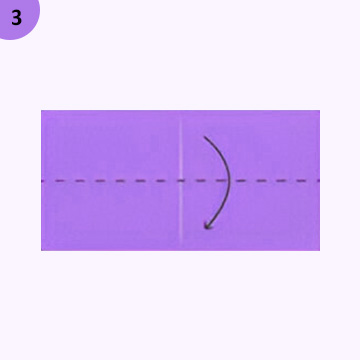
Step 2: Fold the Paper in Half Horizontally
Fold the paper in half from top to bottom to form a rectangle. Crease it well and then unfold it. This crease line will help guide your next folds.
Step 3: Fold Both the Top and Bottom Edges to the Center Crease
Now fold the top edge down to meet the center crease. Do the same with the bottom edge. You’ll now have a smaller rectangular shape with two flaps.
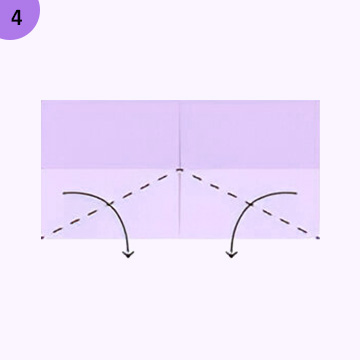
Step 4: Fold the Left and Right Edges to the Center
Fold both the left and right sides of the rectangle to the center line. You’ll create a small square shape. Make sure to press the folds firmly to get clean lines.
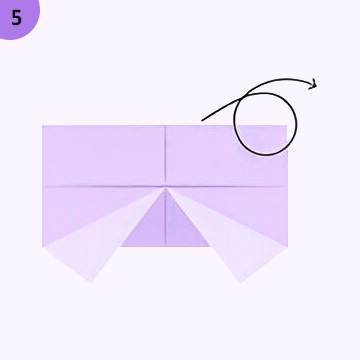
Step 5: Unfold the Last Step
Unfold the left and right folds from Step 4. You’ll see crease marks which will help guide the final shaping of the bus.
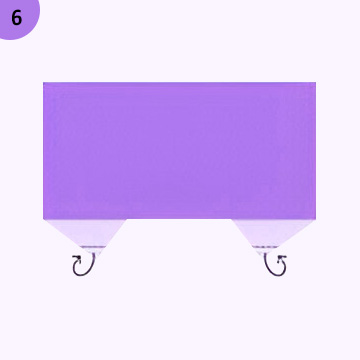
Step 6: Shape the Bus Body
Fold the bottom edge upward just a bit (around 1 cm) to form the base of the bus. This adds a more realistic shape and gives the bus a “floor.”
Step 7: Fold the Top Corners Down Slightly
To create a more bus-like appearance, slightly fold the top-left and top-right corners down to make a soft curve. These will resemble the top edges of a real bus.

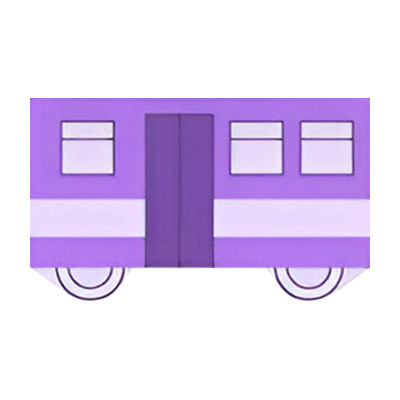
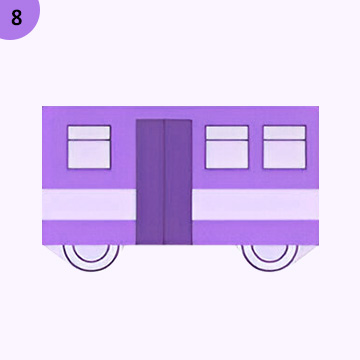
Step 8: Draw Windows, Wheels, and Doors
Use a black marker or pen to draw two or three square windows across the top half. Then draw circular wheels at the bottom. You can even add details like a door, lights, or the school name to personalize your bus!
Bonus Tip: Turn It Into a 3D Bus
If you’re feeling a bit more creative, make two origami bus faces and glue them to the front and back of a small cardboard rectangle. This gives your bus a 3D shape, perfect for school displays or fun room decor.
Educational Benefits of Making an Origami Bus
Creating an origami bus is more than just a fun craft. Here’s what your child or student learns:
- Geometry Concepts: Folding involves symmetry, angles, and shapes.
- Sequencing and Following Instructions: Perfect for cognitive development.
- Hand-Eye Coordination: Precision folds improve control.
- Storytelling Opportunities: Kids can make a bus and narrate a journey it goes on.
So while your child is having fun, they’re also picking up valuable life and learning skills.
Customize Your Origami Bus
Want to take your origami bus to the next level? Here are some creative customization ideas:
- Use colored paper to create different types of buses (e.g., red for a city bus, blue for a tour bus).
- Add characters: Draw smiling faces in the windows or cut out tiny paper people.
- Turn it into a moving toy: Attach bottle caps as wheels to make it roll!
- Make a fleet: Fold multiple buses and create a bus station craft project.
Final Thoughts
Making an origami bus is a great way to combine fun, learning, and creativity. With just one piece of paper and these 8 easy steps, you can turn a flat square into a lively, adorable bus model. It’s an ideal activity for kids, classrooms, or family craft time.
So next time you’re looking for a quick and entertaining hands-on project, remember this guide on how to make an easy origami bus. Whether it’s for a school assignment or just a quiet afternoon activity, this paper craft is sure to bring smiles and learning together.
FAQs About Making Origami Buses
Q1. Can I use A4 paper instead of square paper?
Yes! Just cut the A4 paper into a square first for accurate folds.
Q2. Is this origami bus suitable for preschoolers?
Yes, with adult supervision and some help, preschoolers can enjoy making this simple model.
Q3. Can I use colored pencils instead of markers?
Absolutely. Any coloring tools will work for decorating your bus.
Q4. How long does it take to complete?
It usually takes about 10–15 minutes, making it a perfect short activity.