
How To Make An Easy Origami Camel: 19 Step-by-Step Instructions
Origami is a fascinating art that transforms a simple piece of paper into amazing shapes and creatures. Among the many paper animals you can create, the origami camel stands out for its unique structure and symbolism. In this guide, you’ll learn how to make an easy origami camel in 19 step-by-step instructions, perfect for beginners and kids.
Whether you’re looking for a fun craft project or a creative way to relax, this easy origami camel tutorial will help you create a beautiful paper camel using just a square sheet of paper. Let’s dive in!
Materials You’ll Need
Before we start folding, make sure you have the following:
- A square sheet of origami paper (6×6 inches is a good size)
- A flat surface to work on
- Optional: A bone folder or ruler (for sharp creases)
Origami Art and Craft Materials on Amazon
Why Make an Origami Camel?
The camel represents endurance, strength, and adaptability. Folding a paper camel can be both symbolic and relaxing. Plus, it’s a great addition to your origami animal collection. It can also be used in school projects, desert-themed decorations, or as a unique gift.
How To Make An Easy Origami Camel: 19 Step-by-Step Instructions
Let’s begin! Follow these easy instructions carefully, and you’ll have a neat origami camel in no time.
Step 1: Start With the Colored Side Facing Down
Place your origami paper on a flat surface with the colored side facing down. This ensures that the final design will show the color on the outside.
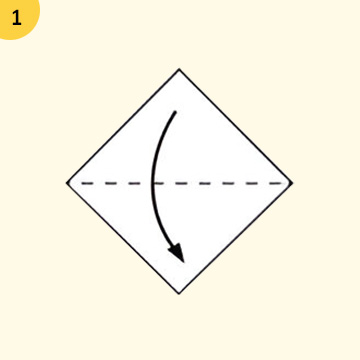
Step 2: Fold Diagonally
Fold the paper diagonally from the bottom-left corner to the top-right corner. Crease well and unfold. Now repeat by folding from the bottom-right corner to the top-left corner. Unfold.
You should now have an “X” crease pattern.
Step 3: Fold Horizontally and Vertically
Now fold the paper in half vertically (left to right), crease well, and unfold. Repeat by folding it horizontally (top to bottom), then unfold again.
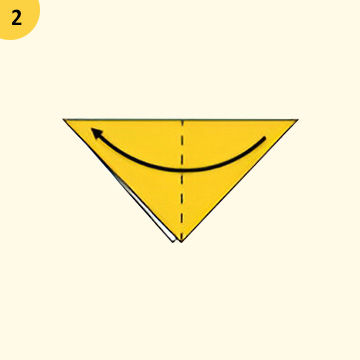
Step 4: Collapse Into Preliminary Base
Using the creases you’ve made, bring the corners together to form a smaller square (preliminary base) with the open flaps at the bottom.
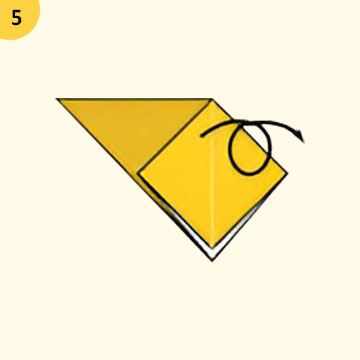
Step 5: Form the Kite Shape
Take the right flap and fold the right edge to the center crease. Repeat with the left flap to form a kite shape. Then unfold both.
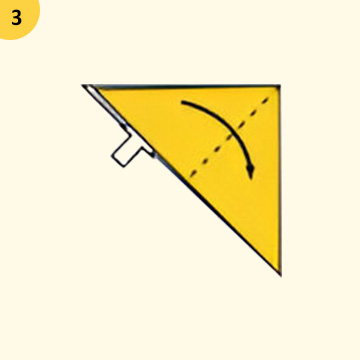
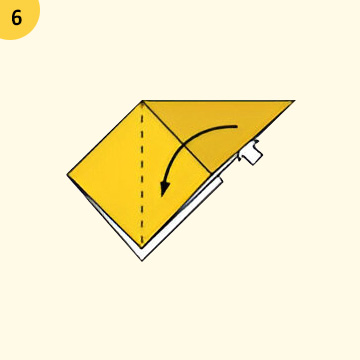
Step 6: Squash Fold the Flap
Lift the top layer at the bottom and squash fold it upward using the creases you made in step 5. This will form a triangle pointing upward.
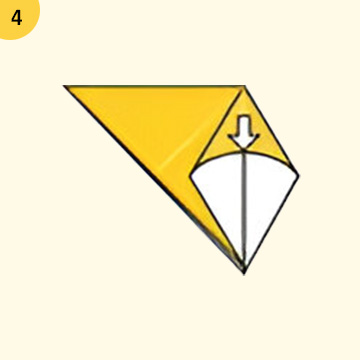
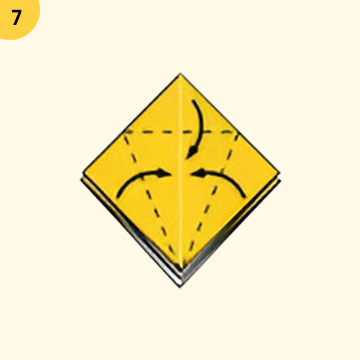
Step 7: Repeat on the Back Side
Flip the model over and repeat the same squash fold on the other side. You should now have a diamond-shaped structure.
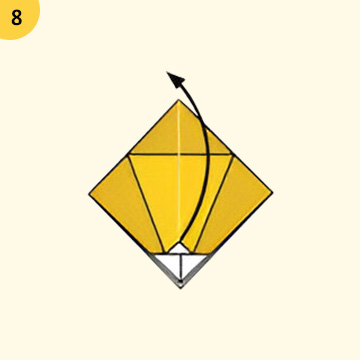
Step 8: Fold the Bottom Corners Inward
Take the bottom-left edge and fold it inward to the center line. Repeat with the bottom-right edge. Then unfold both.
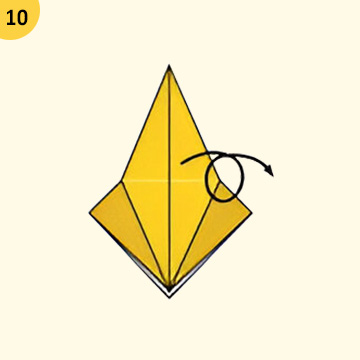
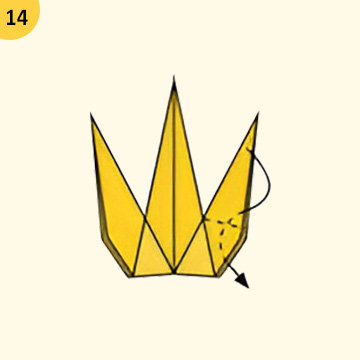
Step 9: Inside Reverse Fold
Lift the bottom point and fold it upward along the crease lines, tucking the sides inside. This forms part of the camel’s leg.

Step 10: Repeat on the Other Side
Flip the model over and repeat the reverse fold to create the second leg of the camel.
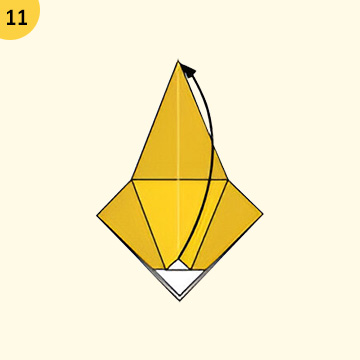
Step 11: Narrow the Camel’s Body
Fold the outer edges of the model slightly inward on both sides to make the body slimmer.
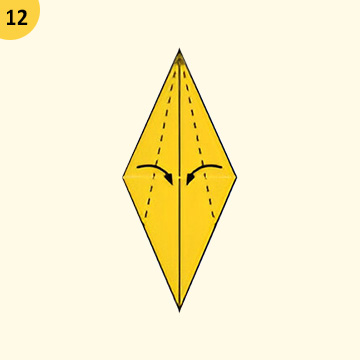
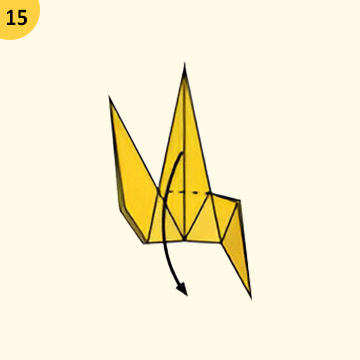
Step 12: Create the Neck
Take the top flap and fold it down diagonally to start shaping the neck. Then use an inside reverse fold to lift and narrow the neck upward.
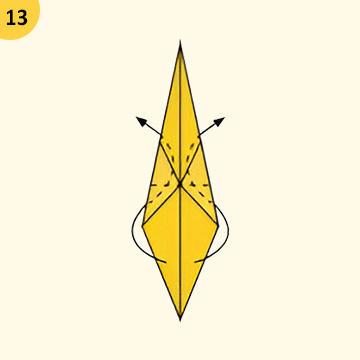
Step 13: Form the Crane
Inside, Reverse Fold up both sides of the paper just like in a paper crane.
Step 14: Adjust the Legs
Reverse Fold the back part down to make the back legs.
Step 15: Shape the Legs
Gently pull the front and back layers at the bottom apart to spread the camel’s legs. Adjust them for balance so it can stand
Step 16: Create the head
Reverse Fold the tip down to make the head.

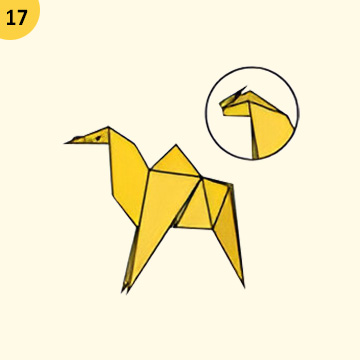
Step 17: Shape the head
Inside Reverse Fold the tip of the head.
Step 18: Create the Tail
At the bottom of the model, fold a small triangle outward to form the tail.
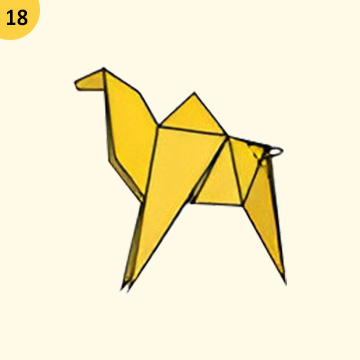
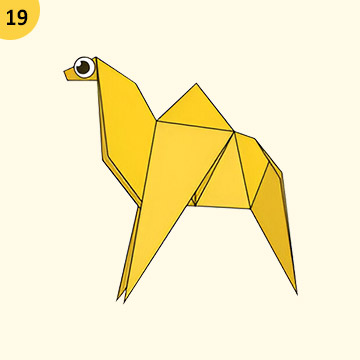
Step 19: Final Adjustments
Check the entire model. Adjust folds as needed. Flatten sharp edges, straighten the legs, and make sure the camel can stand on its own.
Congratulations! You’ve just made an origami camel in 19 simple steps.
Bonus Tips for a Perfect Origami Camel
- Use thicker origami paper if you want a sturdier camel.
- Practice on scrap paper before using colored sheets.
- Add eyes or decorations with markers to personalize your camel.
- For kids, use larger paper for easier handling.
Creative Ways to Use Your Origami Camel
Now that you’ve learned how to make an origami camel, here are a few fun ways to use your creation:
- Classroom or homeschool desert displays
- Party decor for travel or desert themes
- Handmade greeting card embellishment
- A fun gift or collectible in your origami animal zoo
- Storytelling props for tales set in the desert
Final Thoughts
Learning how to make an easy origami camel in 19 step-by-step instructions is a rewarding and creative experience. With just a piece of paper and a few simple folds, you’ve created a symbol of strength and endurance. Whether you’re a beginner or just looking for a new project, this origami camel is a great addition to your collection.
Keep folding, stay creative, and share your masterpiece with friends and family!


