How To Make An Easy Origami Car: 8 Step-by-Step Instructions
Origami, the ancient Japanese art of paper folding, offers a wonderful way to create delightful crafts using just paper and your hands. One of the simplest and most fun projects for beginners and kids alike is making an origami car. In this guide, you’ll learn how to make an easy origami car in 8 simple step-by-step instructions. Whether you’re a parent looking for a fun activity with your child or a craft enthusiast eager to expand your skills, this tutorial is perfect for you.
Why Make an Origami Car?
Origami cars are more than just paper crafts. They stimulate creativity, enhance motor skills, and encourage concentration. Kids especially enjoy creating things they can later play with. Unlike other paper crafts, origami doesn’t require scissors or glue, just a single sheet of paper and some folds.
Let’s get started with this beginner-friendly origami car tutorial!
What You’ll Need
- 1 square sheet of paper (15cm x 15cm is ideal)
- Flat surface for folding
- Optional: Crayons or markers to decorate your car
Tip: Use colored paper to give your car a vibrant finish.
Origami Art and Craft Materials on Amazon
8 Easy Steps to Make an Origami Car
Step 1: Start With a Square Paper (Color Side Down)
Place your square paper on a flat surface, with the colored side facing down. This ensures that the colored side will show on the outside of the car once you complete the folding.
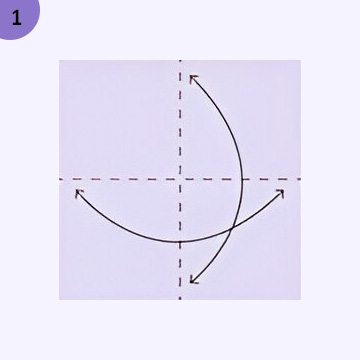
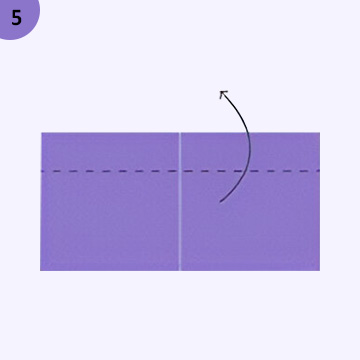
Step 2: Fold the Paper in Half (Top to Bottom)
Fold the paper in half horizontally by bringing the top edge down to meet the bottom edge.
Crease well, then unfold.
You’ll now have a horizontal crease in the center.
Step 3: Fold the Paper in Half (Side to Side)
Next, fold the paper vertically from left to right.
Crease firmly and unfold.
Now you should have two intersecting creases forming a “+” shape in the center.
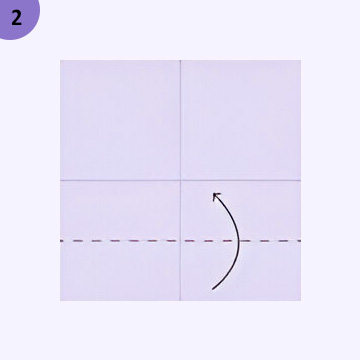
Step 4: Fold the Top and Bottom Edges to the Center Crease
Fold the top edge down to the horizontal center crease.
Do the same with the bottom edge, folding it up to meet the center.
This will create a long rectangle.
Step 5: Fold the Left and Right Edges to the Center
Now, fold the left edge to the vertical center crease.
Repeat the process with the right edge.
You should now have a smaller square shape with four flaps.
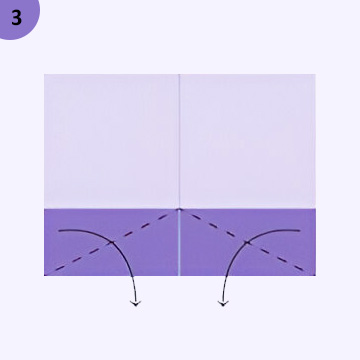
Step 6: Create the Wheels
To form the wheels of your origami car, fold the bottom-left and bottom-right corners inward at a slight diagonal angle. Do the same with the top-left and top-right corners.
This gives the impression of a rounded car shape. These folds don’t have to be exact, just make sure they’re symmetrical for best results.

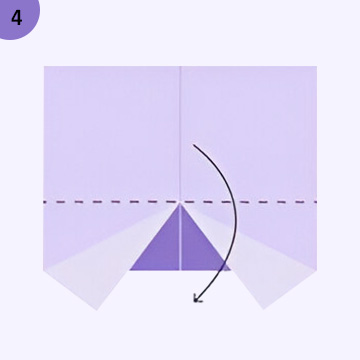
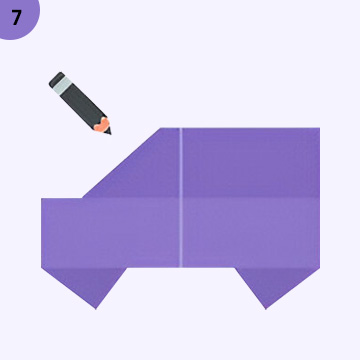
Step 7: Fold the Bottom Edge Slightly Upward
Fold the bottom edge upward by about 1–1.5 cm to create a flat base for the car.
This adds more dimension and stability to the car design.
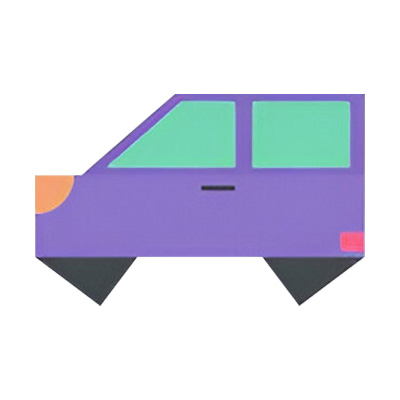
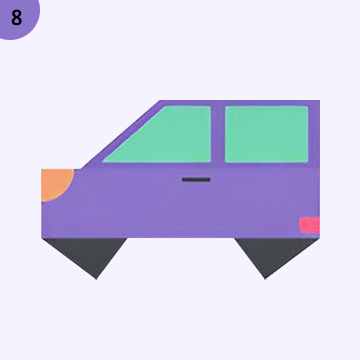
Step 8: Open Up and Shape the Car
Now gently lift the paper to stand your car upright. You can gently puff the paper up from the center to give it a 3D look.
Use your fingers to shape the edges and adjust the wheels.
Your origami car is now complete!
Optional: Decorate Your Origami Car
Once you’ve completed your origami car, feel free to personalize it. Here are a few ideas:
- Draw headlights and taillights with a marker.
- Add racing stripes or numbers to make it look like a race car.
- Use stickers or washi tape to create your own unique design.
These finishing touches can turn your simple car into a mini paper masterpiece.
Benefits of Making Origami Cars
Making an origami car may seem like just a fun project, but it offers numerous developmental and cognitive benefits:
✅ Improves Focus and Patience
Following step-by-step instructions helps improve concentration and patience—especially beneficial for children.
✅ Develops Fine Motor Skills
The folding actions improve hand-eye coordination and dexterity, ideal for young learners.
✅ Encourages Creativity
Kids can design, color, and even modify their cars to create trucks, race cars, or vans.
✅ Boosts Self-Esteem
Successfully completing an origami model gives a strong sense of accomplishment.
Who Can Make This Origami Car?
This easy origami car project is perfect for:
- Kids (Ages 5+) with supervision
- Teachers looking for classroom activities
- Parents wanting to reduce screen time
- Origami beginners of all ages
With just a square of paper and some enthusiasm, anyone can create their own origami vehicle.
Final Thoughts
Learning how to make an easy origami car in 8 step-by-step instructions is a fantastic way to introduce yourself, or your kids, to the art of origami. It’s fun, educational, and gratifying. Once you’ve mastered this simple model, you can experiment with more detailed designs, including trucks, buses, or even transforming cars!
So grab a piece of paper and start folding. Your origami journey has just begun, and it starts with four wheels and a few folds.