How To Make An Easy Origami Fish 13 Step By Step Instructions
Origami is a fascinating art form that transforms a simple piece of paper into beautiful shapes and creatures without using scissors or glue. One of the easiest and most popular origami models for beginners is the origami fish. Whether you’re introducing your child to paper folding or looking for a relaxing craft activity, this 13-step origami fish tutorial is perfect for you.
In this article, you’ll learn how to make an easy origami fish step by step, with clear instructions to guide you from start to finish. Let’s dive in!
What You Need
Before you begin folding, gather the following materials:
- A square sheet of origami paper (any size, ideally 6×6 inches or 15×15 cm)
- Flat surface for folding
- Optional: markers or pens to decorate your fish
Choose a colorful paper to make your fish more vibrant and fun!
Origami Art and Craft Materials on Amazon
Benefits of Making Origami Fish
Before we jump into the steps, here are a few quick reasons to try this project:
- Improves fine motor skills
- Enhances concentration and patience
- Fun bonding activity with kids or students
- Makes great DIY room decor or classroom crafts
Now, let’s learn how to make this easy origami fish in 13 simple steps.
Step-by-Step Guide to Making an Origami Fish
Step 1: Start With the Colored Side Up
Place your square origami paper on a flat surface, colored side facing up. This will be the outer side of your fish.
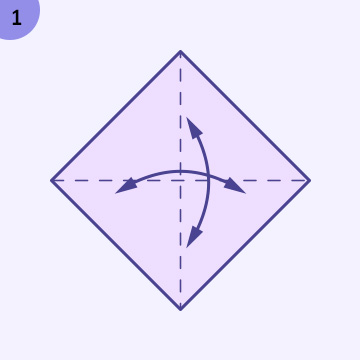
Step 2: Fold Diagonally (Corner to Corner)
Fold the paper diagonally from one corner to the opposite corner to make a triangle. Crease well and then unfold.
Step 3: Fold the Opposite Diagonal
Now fold the other diagonal (the other two corners) and crease well. Unfold the paper again. You should now see an “X” crease pattern on your paper.
Step 4: Fold Horizontally
Fold the paper in half horizontally, aligning the top edge to the bottom edge. Crease sharply, then unfold.
Step 5: Fold Vertically
Fold the paper in half vertically, aligning the left edge to the right edge. Unfold again. Your paper should now have four creases intersecting in the center.
Step 6: Collapse Into a Triangle Base
Using the creases as guides, collapse the paper into a triangle shape by bringing two opposite corners together. This forms a preliminary base (a triangle with two flaps on each side).
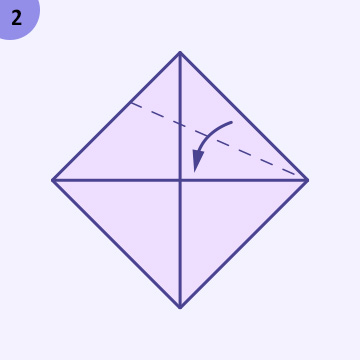
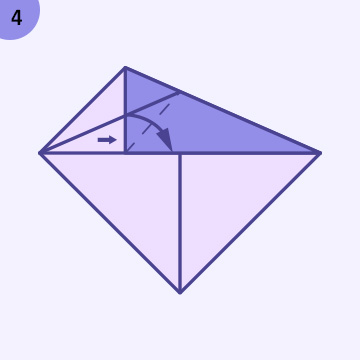
Step 7: Fold the Right Corner to the Top
Take the right corner of the triangle and fold it upward to meet the top point of the triangle. Crease well.
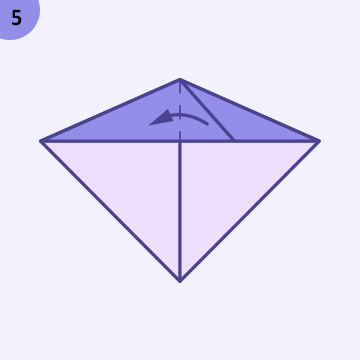
Step 8: Fold the Left Corner to the Top
Now fold the left corner up to meet the same top point. You now have a diamond shape with a vertical seam in the middle.
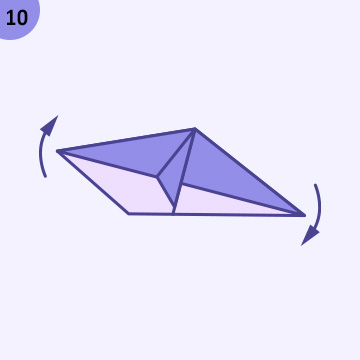
Step 9: Turn the Model Over
Flip the entire model over so the folds are facing down.
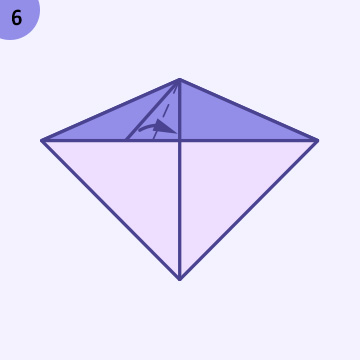
Step 10: Fold the Right Edge to the Center
Take the right edge and fold it toward the center vertical crease, aligning the edge nicely.
Step 11: Fold the Left Edge to the Center
Repeat with the left edge, folding it toward the middle to match the other side. This will make the fish’s body narrower.
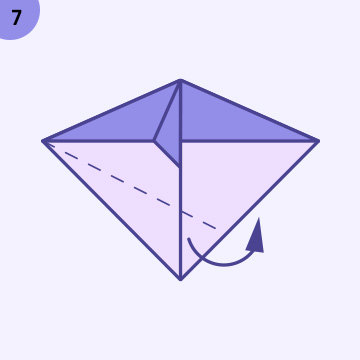
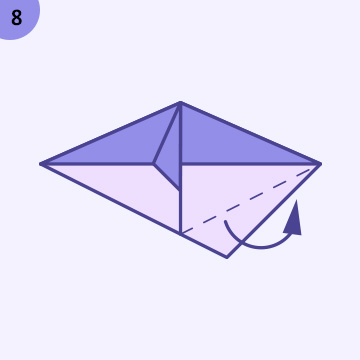
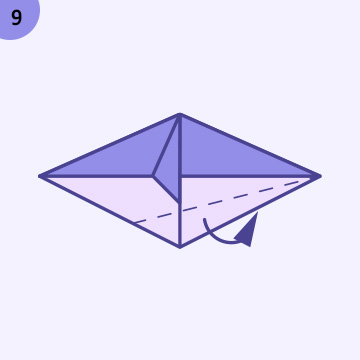
Step 12: Create the Tail Fins
Fold the bottom point of the model upward slightly to create a small triangle. This will form the fish’s tail fin. Adjust to your preference.
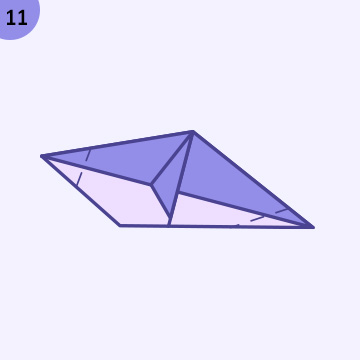
Step 13: Add Details and Decorate
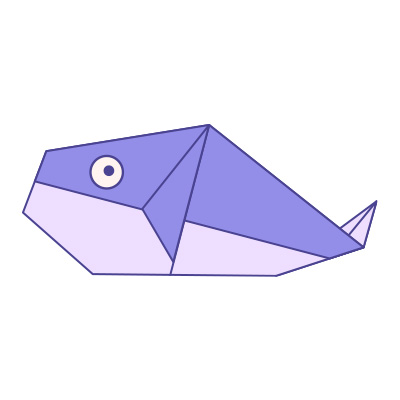
Congratulations! You’ve completed your origami fish. You can now add eyes, scales, or color patterns with pens or markers to bring your fish to life.

Tips for Beginners
If this is your first time making origami, here are a few helpful tips:
- Use thin origami paper: It folds easier and creates sharper creases.
- Crease every fold neatly: Press down firmly with your fingernail for precise folds.
- Be patient: Follow each step slowly; origami is both fun and relaxing.
- Watch a video: Visual learners might benefit from a video tutorial alongside written steps.
Fun Ideas for Your Origami Fish
Once you’ve mastered the basic origami fish, try these creative ideas:
- Make a school of fish using different colored paper
- Attach your fish to a string and make a mobile or hanging decoration
- Use your origami fish in a scrapbook, greeting card, or collage
- Create an underwater wall art display for your child’s room or classroom
Origami crafts can be both decorative and educational!
Why Kids Love Making Origami Fish
Children love this craft because it’s simple, colorful, and fast. Plus, it teaches spatial awareness, sequencing, and problem-solving. Teachers often use origami fish crafts in classrooms to support creative thinking and coordination. It’s also a popular rainy-day activity at home!
Conclusion
Making an easy origami fish in 13 step by step instructions is a perfect way to enjoy a creative break. Whether you’re a complete beginner or folding with your kids, this project is simple, satisfying, and sure to make you smile. With just one piece of paper, you can create a fun aquatic friend and learn the beauty of Japanese paper art.
So, grab a square sheet of paper and start folding today. Your underwater adventure awaits!
Keywords: easy origami fish, origami fish step by step, how to make origami fish, origami for beginners, origami fish tutorial, paper fish craft, 13 step origami fish


