
How To Make An Easy Origami Lion: 15 Step-by-Step Instructions
Origami, the ancient Japanese art of paper folding, is a delightful and creative hobby that anyone can enjoy. Among the many animals and figures you can create, the origami lion stands out as a majestic and fun project. Whether you’re a beginner or someone who loves paper crafts, making an origami lion is easier than you might think! In this guide, I’ll walk you through 15 simple, step-by-step instructions to help you fold an easy origami lion that looks impressive and ready to roar.
Why Make an Origami Lion?
Lions symbolize courage, strength, and nobility, making them a popular subject in art and crafts. Origami lions are not only great for decoration but also perfect for kids’ crafts, school projects, and even as a unique gift. Plus, origami helps improve focus, patience, and fine motor skills.
If you’re ready to learn how to make a lion using just a simple square piece of paper, let’s get started!
Materials Needed
- One square sheet of origami paper (preferably orange, yellow, or brown for a realistic lion)
- A flat surface to fold on
- Optional: a pencil or marker to draw eyes and nose after folding
Origami Art and Craft Materials on Amazon
Step-by-Step Instructions to Make an Easy Origami Lion
Step 1: Start with a Square Paper, Colored Side Down
Place your square origami paper on the flat surface with the colored side facing down.
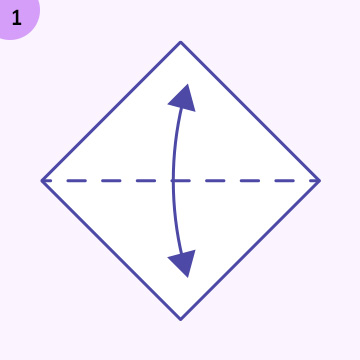
Step 2: Fold Diagonally in Both Directions
Fold the paper diagonally from corner to corner, forming an “X” crease on your paper. Unfold both folds.
Step 3: Fold Horizontally and Vertically
Fold the paper in half horizontally, crease well, then unfold. Repeat vertically, creating a “+” crease pattern intersecting with the “X” you made earlier.
Step 4: Collapse the Paper into a Waterbomb Base
Push the sides inwards along the creases so that your paper collapses into a triangle shape known as the “waterbomb base.”
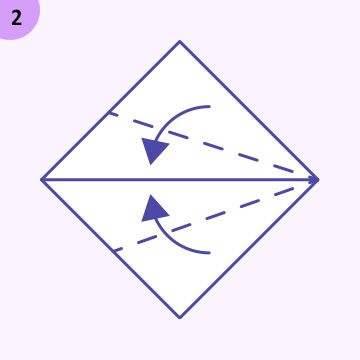
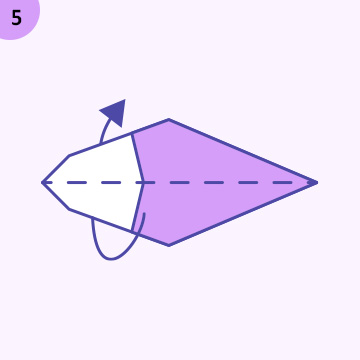
Step 5: Fold the Triangle’s Bottom Corners Up
Take the bottom corners of the triangle and fold them up to meet the top point of the triangle.
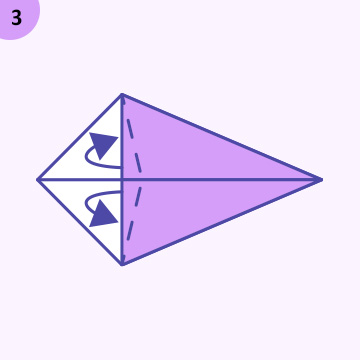
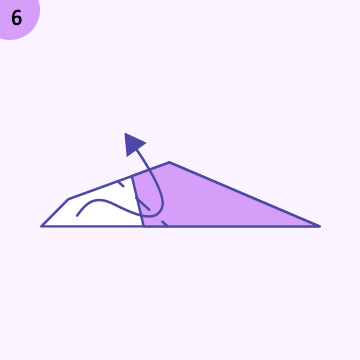
Step 6: Fold the Outer Corners to the Center
Fold the outer edges of the shape toward the center crease, forming a kite shape.
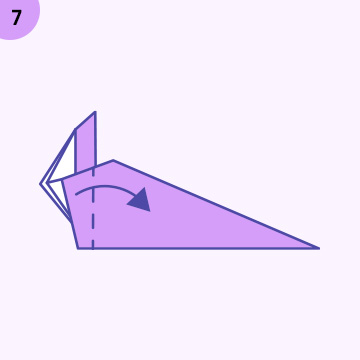
Step 7: Fold the Kite Shape in Half
Fold your kite shape in half vertically, keeping the folds neat and sharp.
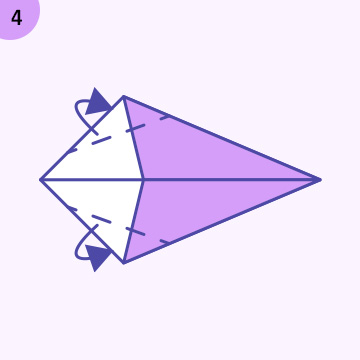
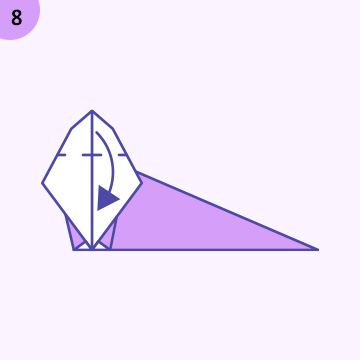
Step 8: Create the Lion’s Head by Folding Down the Top Point
Fold down the top point of the kite shape to form the lion’s head.
Step 9: Shape the Lion’s Mane
To give your lion a majestic mane, fold small accordion pleats around the edges of the head. These folds create the fluffy mane effect.
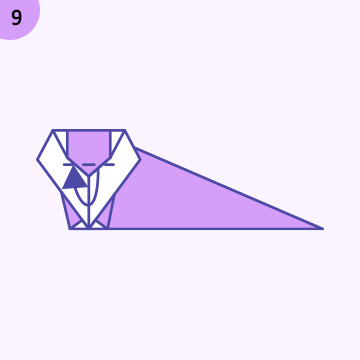
Step 10: Fold the Bottom Part Up for the Lion’s Body
Fold the bottom part of your model upwards about halfway, making a clean crease to form the body.
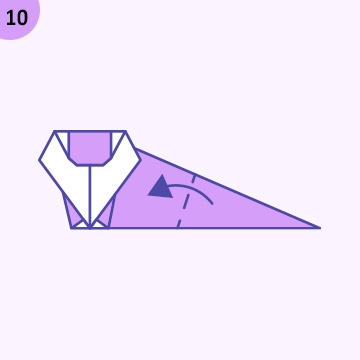
Step 11: Form the Legs by Folding Small Triangles
At the bottom of the body, fold small triangles outward on each side. These will act as the lion’s front legs.
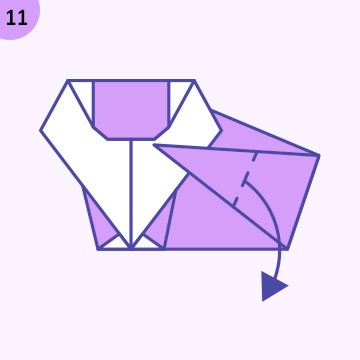
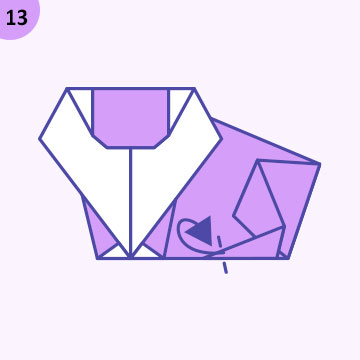
Step 12: Fold Back a Small Triangle for the Tail
On the opposite end of the legs, fold back a small triangle to create the tail.
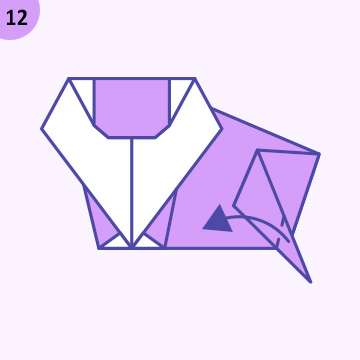
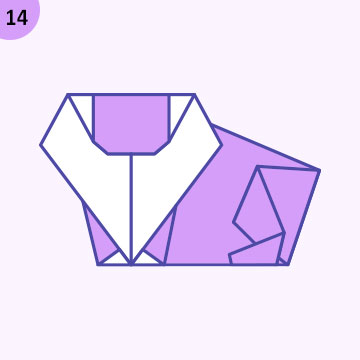
Step 13: Open the Legs Slightly
Gently open the leg folds to give your lion a stable base so it can stand.
Step 14: Adjust and Refine the Mane and Face
Make final adjustments to the mane folds and the face area to ensure your lion looks full and balanced.
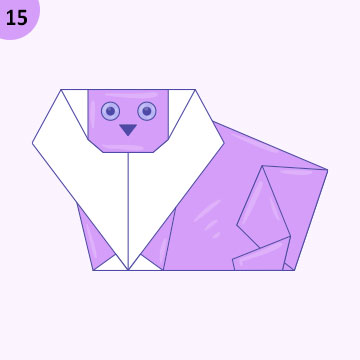
Step 15: Add Details (Optional)
Use a pencil or marker to draw eyes, a nose, and whiskers to bring your origami lion to life.
Tips for Best Results
- Use square origami paper: The standard size is 15cm x 15cm, but you can try larger sheets for a bigger lion.
- Crease sharply: Use your fingernail or a flat tool to get crisp folds.
- Take your time: Precise folds create a neat and attractive lion.
- Choose colored paper: Orange, yellow, or brown paper enhances the lion’s appearance.
Why Origami Is Great for All Ages
Origami is an enjoyable and calming activity suitable for kids, adults, and seniors alike. It promotes creativity, improves concentration, and offers a tangible sense of accomplishment. Making an origami lion also teaches patience and careful attention to detail.
Creative Uses for Your Origami Lion
Once your lion is complete, you can:
- Use it as a unique desk ornament or shelf decoration.
- Gift it to a friend who loves animals or Japanese culture.
- Incorporate it into a wildlife-themed craft project.
- Make multiple lions and create a whole origami animal kingdom.
Frequently Asked Questions
Q: Can I use regular paper for origami?
A: Yes, but origami paper is thinner and folds more easily, giving better results.
Q: How long does it take to make an origami lion?
A: About 15-20 minutes for beginners, less with practice.
Q: Can I make the lion more detailed?
A: Absolutely! Once you master the basic lion, you can try adding extra folds to create more intricate manes or paws.
Conclusion
Making an origami lion is a rewarding and enjoyable craft that anyone can learn with just one square sheet of paper. By following these 15 simple steps, you can create a lion that looks proud and majestic. Origami not only fosters creativity but also provides a relaxing break from the digital world. Try it today and unleash your inner artist with this easy origami lion!


