
How To Make An Easy Origami Mouse: 15 Step-by-Step Instructions
If you’re looking for a fun and creative way to spend your time, learning how to make an origami mouse is a fantastic option. This simple paper craft doesn’t require any expensive tools or materials, just a square piece of paper and a little patience. Origami, the ancient Japanese art of paper folding, is not only relaxing but also helps improve focus, hand-eye coordination, and fine motor skills.
In this guide, we’ll show you how to make an easy origami mouse in 15 step-by-step instructions. Whether you’re a beginner or just looking for a quick project, this mouse is a great place to start.
What You’ll Need
Before we dive into the steps, gather the following items:
- A square piece of paper (preferably origami paper, but any square will do)
- A flat surface for folding
- Optional: a pen or marker to draw eyes and a nose
Origami Art and Craft Materials on Amazon
Origami Mouse: 15 Easy Steps
Step 1: Start With a Square Paper
Begin with your square sheet of paper color side up (if it has a colored side). This will be the outside of your mouse.
Step 2: Fold Diagonally
Fold the paper diagonally in half to form a triangle. Crease well, then unfold. Now fold the opposite diagonal and crease it well. Unfold again. You should now see an “X” crease pattern.
Step 3: Fold in Half Horizontally
Fold the paper in half from top to bottom, crease, and unfold. Repeat for the left to right direction. This creates a “+” crease pattern intersecting the “X”.
Step 4: Collapse Into a Triangle
Using the creases as guides, bring the horizontal and vertical folds inward. Pinch the sides to collapse the paper into a triangle shape (this is called a “waterbomb base”).
Step 5: Rotate the Triangle
Turn the triangle so the point faces down. This orientation makes the next steps easier.
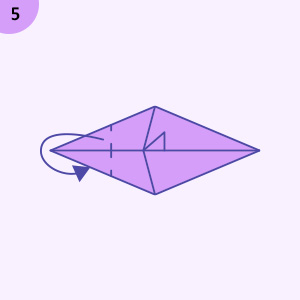
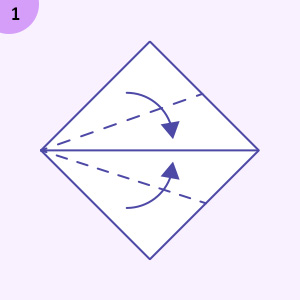
Step 6: Fold the Bottom Corners Up
Take both bottom corners of the triangle and fold them upward so they meet at the top point. You should now have a diamond shape.
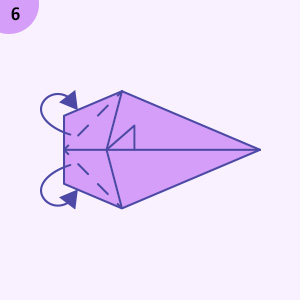
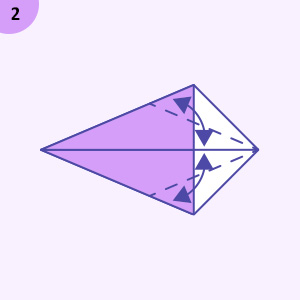
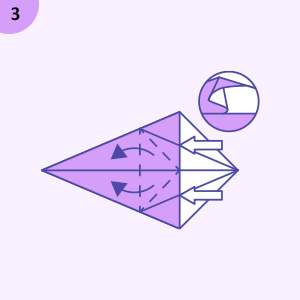
Step 7: Fold the Side Points to the Center
Fold the left and right side points of the diamond inward toward the center crease, forming a kite shape.

Step 8: Flip the Paper Over
Turn the model over so the folded flaps are now on the back side.

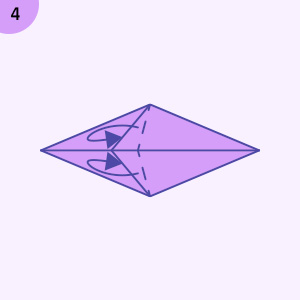
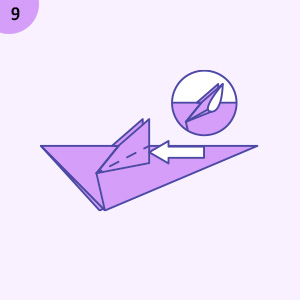
Step 9: Fold the Top Point Down
Fold the top point of the kite down about one-third of the way. This will form the mouse’s head.
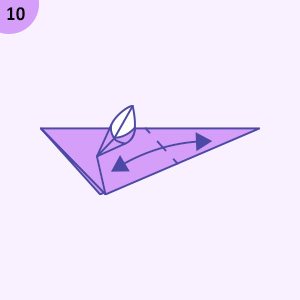
Step 10: Create the Ears
Fold small triangular flaps on the top corners outward to form the mouse’s ears. Make sure they are symmetrical.
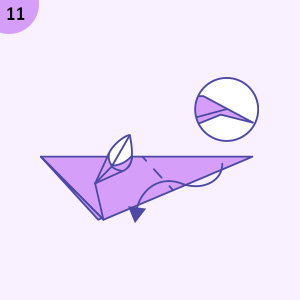
Step 11: Form the Body
Take the bottom point of the kite and fold it upward slightly to create the base of the mouse’s body. This should look like a small tail forming beneath the body.
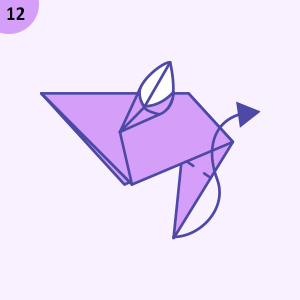
Step 12: Fold the Mouse in Half
Fold the entire shape in half vertically so the ears and body align. Now it should resemble the profile of a mouse.
Step 13: Shape the Nose
Pinch the front tip (head) slightly to create a more pointed mouse nose.

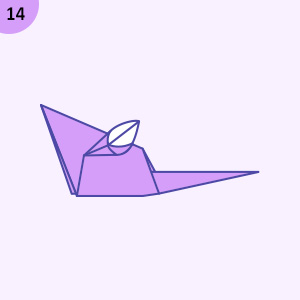
Step 14: Add the Tail
Gently curl the tail upward using your fingers. If you want a curled look, you can wrap it around a pencil for a few seconds.
Step 15: Add Final Touches
Using a pen or marker, draw two small eyes and a nose on the mouse’s head. You can even add whiskers for extra detail.

Tips for Beginners
- Use thinner paper: It’s easier to fold, especially for small detailed steps.
- Practice basic folds first: Understanding valley and mountain folds will make complex models simpler.
- Be patient: Origami is about precision and focus. Take your time, especially with tiny folds.
Why Make an Origami Mouse?
Creating an origami mouse isn’t just a fun craft—it also offers several benefits:
1. Educational for Kids
Origami teaches geometry, symmetry, and spatial understanding. It’s a perfect activity for kids that encourages hands-on learning.
2. Great as DIY Decor
You can use your paper mouse as a cute decorative element on desks, shelves, or as part of a handmade gift.
3. Stress-Relieving Hobby
Folding paper into creative shapes is surprisingly relaxing. It can help clear your mind and lower anxiety.
4. Eco-Friendly Fun
It only requires paper, making it an eco-friendly craft that doesn’t contribute to plastic waste.
Final Thoughts
Now that you know how to make an easy origami mouse in 15 step-by-step instructions, you can create as many as you want in different colors and sizes. Try experimenting with patterns or textured paper for a more artistic flair. Whether you’re doing it for fun, teaching a child, or just relaxing, this simple origami mouse is a delightful and rewarding project.
Don’t stop here, explore other easy origami animals like frogs, cranes, and cats to continue your creative journey.
✅ SEO Keywords Used:
- Easy origami mouse
- Origami mouse step by step
- How to make an origami mouse
- Origami mouse instructions
- Origami for beginners
- DIY paper mouse
- Origami animals easy
- Step-by-step origami tutorial


