How To Make An Easy Origami Owl: 12 Step-by-Step Instructions
If you’re looking for a simple and fun craft project, learning how to make an easy origami owl is a perfect choice. This charming paper owl is great for kids, beginners, and origami lovers of all skill levels. With just a square piece of paper and a few easy folds, you’ll have a cute owl in minutes.
In this guide, we’ll walk you through 12 simple step-by-step instructions to help you create your own paper owl. Whether you want to use it for decorating, gifting, or just for fun, this origami owl will impress with its charm and simplicity.
What You Need
Before we begin, make sure you have the following:
- One square sheet of origami paper (preferably 6×6 inches)
- A flat surface for folding
- Optional: A black marker or pen to draw the eyes and details
Let’s get started!
Origami Art and Craft Materials on Amazon
Step-by-Step Instructions to Make an Easy Origami Owl
Step 1: Start With a Square Paper
Place your square sheet of paper color-side down (if it has one). This helps ensure the colored part becomes the outside of the owl.
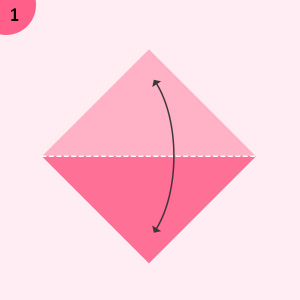
Step 2: Fold the Paper in Half Diagonally
Fold the paper diagonally from one corner to the opposite corner to form a triangle. Crease well and then unfold it. This crease helps guide your next folds.
Step 3: Fold in Half Diagonally the Other Way
Now fold the paper along the other diagonal, forming another triangle. Again, crease and unfold. You should now have an “X” crease on the square.

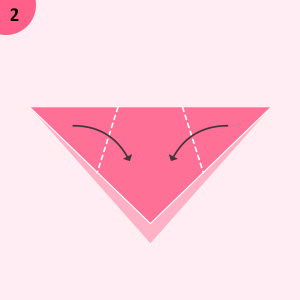
Step 4: Fold the Top Point Down to the Center
Take the top corner of the square and fold it down to the center where the two diagonal creases intersect. This will create the base of the owl’s head.
Step 5: Fold the Bottom Point Up to Just Below the Previous Fold
Take the bottom corner and fold it up, stopping just below the top flap. This forms the owl’s body.
Step 6: Fold the Left and Right Corners to the Center
Now fold the left and right points inward so that they meet at the center line. These folds begin to shape the owl’s wings.
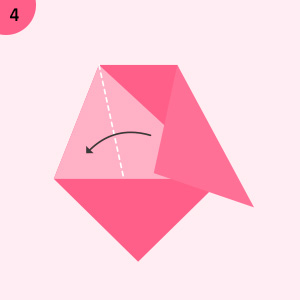
Step 7: Fold Down the Top Triangle
Fold the small top triangle flap downward over the previous folds. This becomes the top of the owl’s head and adds a layered look.
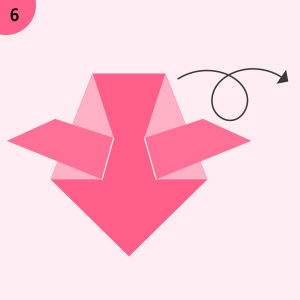
Step 8: Flip the Paper Over
Carefully flip the paper over. You’ll now work on the back to add more structure to your owl.

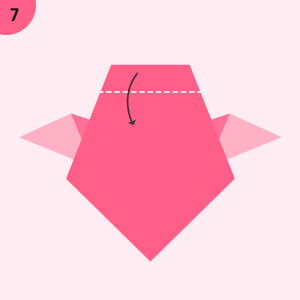
Step 9: Fold the Top Point Down Again
Just like before, fold the top point down about one-third of the way. This helps shape the owl’s face when you turn it back around.

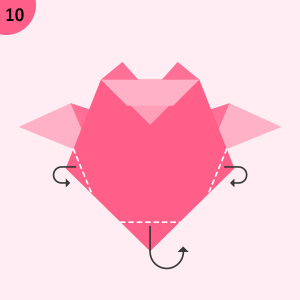
Step 10: Fold Both Sides In Slightly
Fold the left and right sides inward just a little bit, about ½ inch. This makes your owl appear narrower and more natural.
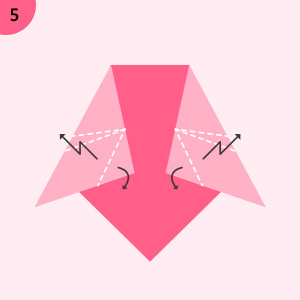
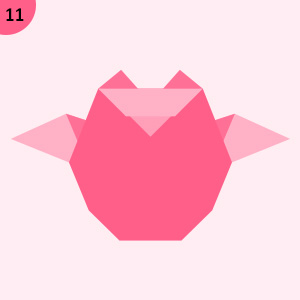
Step 11: Flip It Over and Fold the Top Corners for Ears
Turn the paper back to the front. Now fold down the top two corners at slight angles to create the owl’s ears. Adjust to make them even and symmetrical.
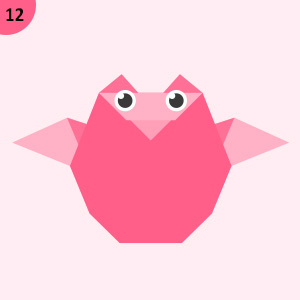
Step 12: Add Eyes and Beak (Optional)
Using a black marker or pen, draw two round eyes and a small triangle for the beak. You can get creative here, use googly eyes, stickers, or colored markers to give your owl personality!
Final Thoughts
Congratulations! You’ve just learned how to make an easy origami owl in 12 steps. This quick and relaxing craft is perfect for all ages. You can use your owl for:
- DIY greeting cards
- Classroom activities
- Scrapbooking
- Desk decorations
- Kids’ crafts
Want to add a little more flair? Try making owls with patterned paper, colored cardstock, or even old magazine pages for a unique look.
Origami Owl FAQs
1. Can kids make this origami owl?
Absolutely! This origami owl is beginner-friendly and great for children with adult supervision.
2. What type of paper is best for origami?
Thin origami paper works best because it’s easy to fold, but regular printer paper cut into a square also works fine.
3. How long does it take to make this owl?
Once you’re familiar with the steps, you can make one in about 5–10 minutes.
SEO Tips: Keywords Used in This Article
To make this article SEO-optimized, we’ve naturally included relevant keywords such as:
- how to make an easy origami owl
- origami owl step by step
- easy paper owl tutorial
- simple origami for kids
- beginner origami owl instructions
These keywords help the article rank better for people searching for easy origami tutorials online.
Conclusion
Learning how to make an easy origami owl is both rewarding and relaxing. With just a piece of paper and a few folds, you’ve created a charming little owl that’s sure to bring smiles. Use this guide to teach others, decorate your space, or even build a collection of colorful paper owls.
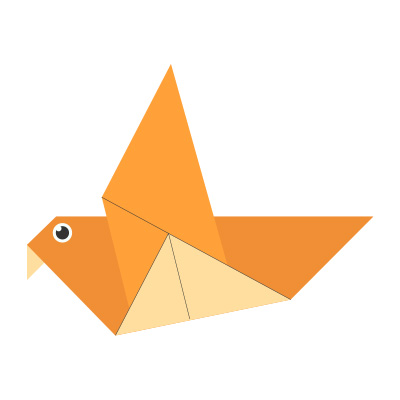
Ready to fold your next creation? Try making an origami fox, cat, or crane next!