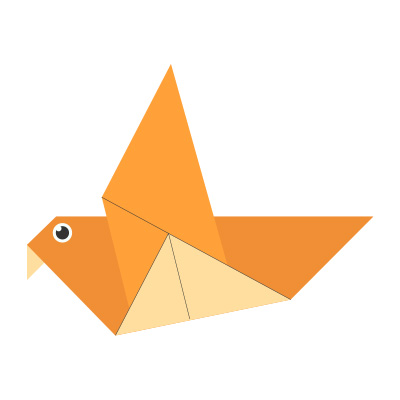
How To Make An Easy Origami Pelican: 13 Step by Step
Origami, the traditional Japanese art of paper folding, has captured the imaginations of hobbyists around the world. Whether you’re a beginner or someone looking to add a charming new figure to your origami collection, making an origami pelican is both fun and rewarding. In this tutorial, you’ll learn how to make an easy origami pelican in 13 step-by-step instructions that even first-timers can follow with ease.
Let’s get started!
What You’ll Need
Before we begin, gather the following:
- A square sheet of origami paper (15×15 cm is ideal)
- Flat surface for folding
- Patience and a little creativity
Optional: You can use two-toned origami paper to give the pelican a more colorful look.
Origami Art and Craft Materials on Amazon
Step-by-Step Instructions to Fold an Easy Origami Pelican
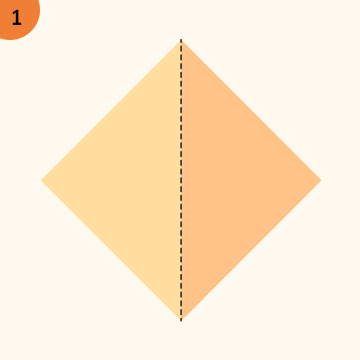
Step 1: Start With the Colored Side Down
Place your square paper flat on the table with the colored side facing down and the white side facing up. This helps the colored part show on the outside of the finished pelican.
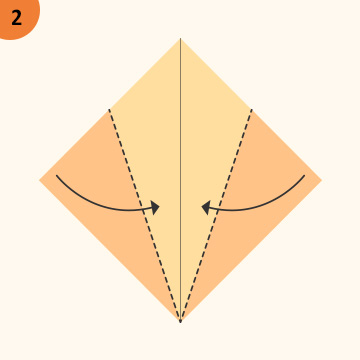
Step 2: Fold the Paper in Half Diagonally
Take one corner and fold it to the opposite corner to form a triangle. Crease the fold well, then unfold the paper back to a square. This creates a diagonal crease.
Step 3: Fold the Opposite Diagonal
Now fold the other two corners together to make another triangle. Again, crease the fold and unfold. You should now have an “X” crease pattern across the square.
Step 4: Fold the Paper in Half Horizontally
Fold the square in half by bringing the top edge to the bottom edge. Crease and unfold. This time the fold is horizontal, not diagonal.
Step 5: Fold the Paper Vertically
Now fold the square in half vertically. Crease and unfold. At this point, you’ll have a grid-like set of creases that will help with the next step.

Step 6: Collapse Into a Waterbomb Base
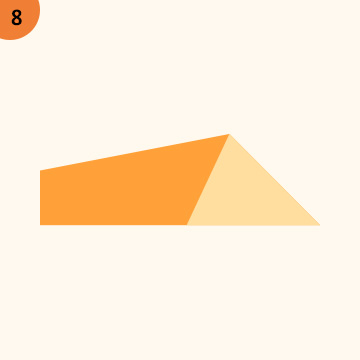
Using the creases as guides, pinch the corners of the paper together and collapse it into a smaller triangle (called the waterbomb base). You’ll end up with a triangle that has layers, this will be the base for your pelican.
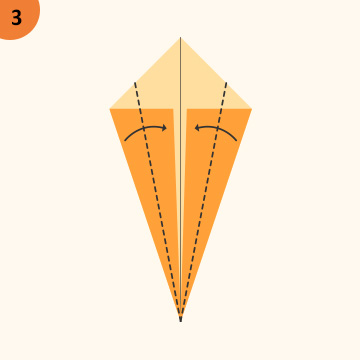
Step 7: Fold the Triangle Into a Diamond
With the triangle pointing down, take the right and left corners of the top layer and fold them upward so they meet at the top corner, forming a diamond shape.
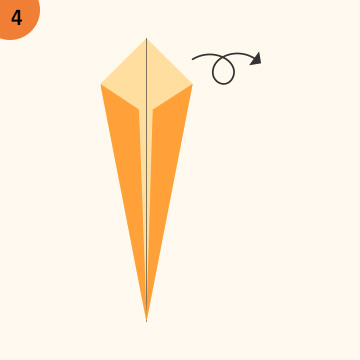
Step 8: Flip and Repeat
Turn the model over and repeat the same step on the other side, folding the outer corners to meet at the top, forming a symmetrical diamond on both sides.
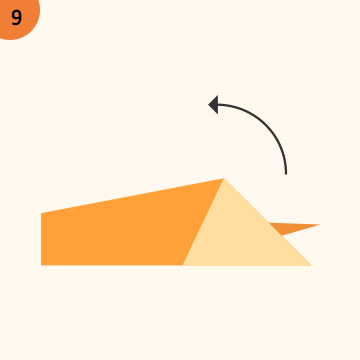
Step 9: Create the Pelican’s Neck
Pick up the top flap of the diamond and fold it upward at a slight angle. This flap will become the pelican’s long neck.
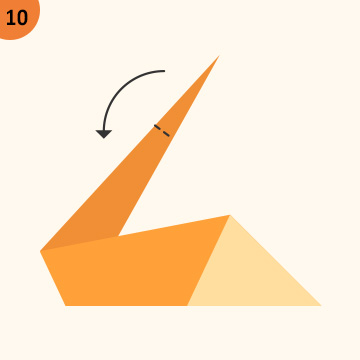
Step 10: Shape the Neck with a Reverse Fold
To give the neck a more realistic angle, perform an inside reverse fold. Open the neck flap slightly, then push the point inward along the crease line to change its direction.
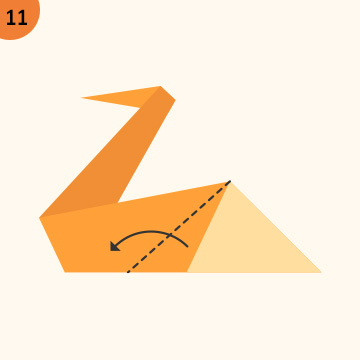
Step 11: Form the Head and Beak
At the end of the neck, fold the tip down to make the pelican’s beak. Again, use a reverse fold technique to make it smooth and stable.
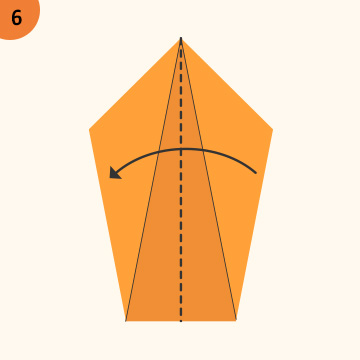
Step 12: Fold Down the Wings
Now go back to the body and gently pull down the outer flaps to form the wings. Angle them slightly backward to mimic the pelican’s graceful wingspan.

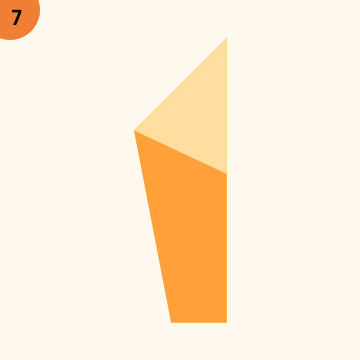
Step 13: Final Adjustments
Stand the model up and make any necessary adjustments. You can flare the wings, sharpen the neck angle, and gently shape the body for better balance and a lifelike appearance.
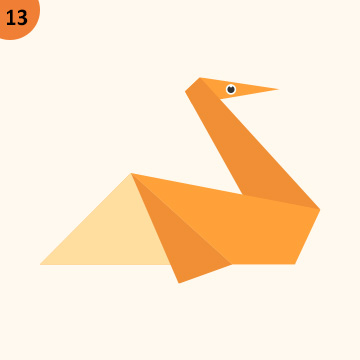
Congratulations! You’ve just completed your easy origami pelican in 13 steps.
Tips for Origami Success
- Use thinner paper if you’re a beginner; it’s easier to fold and shape.
- Crease firmly for clean, crisp folds.
- Don’t rush; origami is about precision and patience.
- Practice makes perfect, your pelican will look better with each attempt.
Why Try Origami Pelicans?
Origami pelicans are perfect for:
- Decorations: Use them as table toppers, party accents, or gifts.
- Educational Projects: Great for teaching children about birds and geometry.
- Stress Relief: Folding paper can be a calming and meditative activity.
- Creative Displays: Combine them with other origami animals for a paper zoo!
Conclusion
Learning how to make an easy origami pelican in 13 step by step is a delightful and accessible craft project for all ages. With just a square piece of paper and a bit of focus, you can create a charming paper bird that captures the elegance of a pelican in flight. Whether you’re folding for fun, school, or creative expression, this tutorial is the perfect way to start.
So grab a sheet of paper and let your creativity soar!