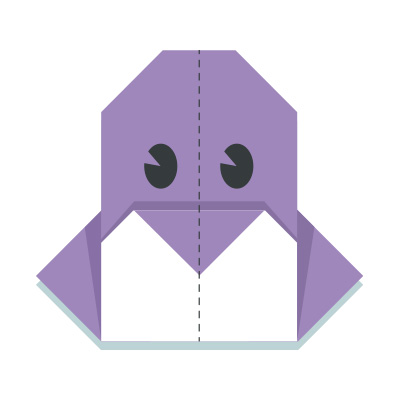
How To Make An Easy Origami Penguin 8 Step by Step Instructions
Origami, the ancient Japanese art of paper folding, offers endless possibilities for creativity with nothing more than a simple sheet of paper. If you’re new to origami or just looking for a fun project to do with kids, an origami penguin is the perfect place to start. It’s simple, charming, and can be made in just a few minutes. In this guide, we will walk you through how to make an easy origami penguin in 8 step-by-step instructions.
Whether you’re crafting for a school project, decorating a holiday card, or simply enjoying a quiet creative moment, this easy origami tutorial will have you folding like a pro in no time.
Materials You Will Need
Before we begin, here’s what you’ll need to make your origami penguin:
- 1 square sheet of paper (preferably black on one side and white on the other)
- A flat surface to fold on
- (Optional) A black marker to draw eyes
- (Optional) Glue if you want to secure the final shape
Origami Art and Craft Materials on Amazon
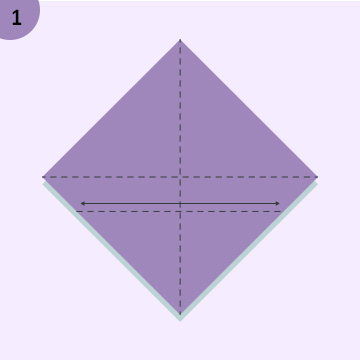
Step 1: Start with the Colored Side Facing Down
Place your square paper on the table with the white side facing up and the colored side (black) facing down. This will help form the distinctive white belly and black back of the penguin.
Fold the paper diagonally in half from one corner to the opposite corner, forming a triangle. Crease the fold well and then unfold the paper back to a square. This crease will help guide the next folds.
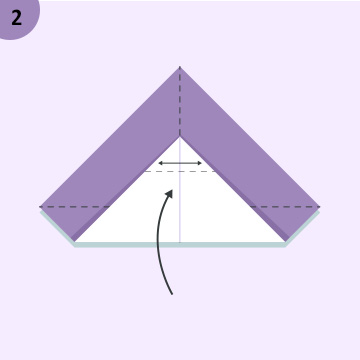
Step 2: Fold Diagonally Again
Now fold the square diagonally in the opposite direction, forming another triangle. Once again, crease it well and then unfold. Your paper should now have two diagonal creases forming an “X” across it.
These initial creases help center your folds as you go.
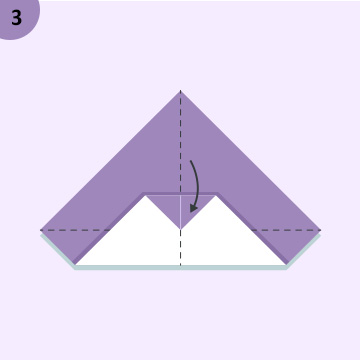
Step 3: Fold the Bottom Corner Up to the Top
Next, fold the bottom point of your square up to the top point, creating a triangle. This fold should be done with the colored side on the outside and the white side hidden inside.
This triangle will form the base of the penguin’s body.
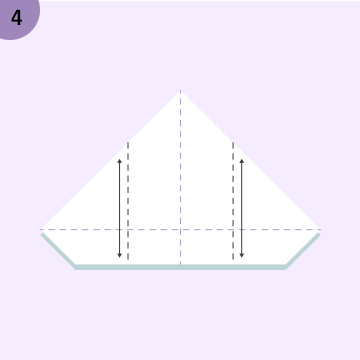
Step 4: Fold the Triangle in Half Vertically
Take your triangle and fold it in half vertically by bringing the left point to meet the right point. Crease firmly and then unfold.
This center crease will help guide the shaping of the penguin’s head and body.
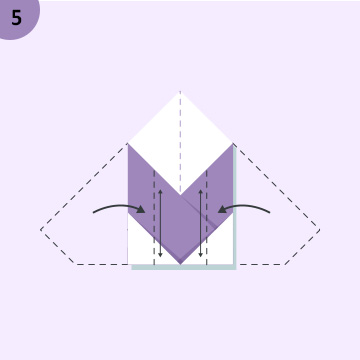
Step 5: Fold the Top Layer’s Left Point to the Center
On the front triangle, take only the top layer’s left corner and fold it diagonally toward the center crease. The edge should line up with the middle.
Repeat the same fold with the top layer’s right corner, folding it to the center as well. These folds create the wings of the penguin.
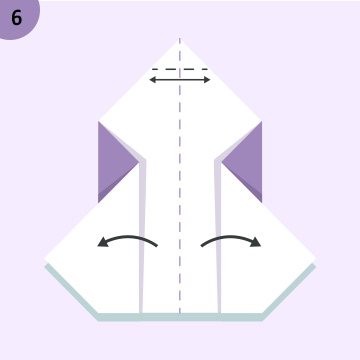
Step 6: Flip and Fold Down the Top Point
Flip the paper over to the other side. Then, fold down the top corner (the single point) about an inch or so to form the penguin’s head. You can adjust the size of the head depending on how tall or short you want your penguin to look.
Make sure the fold is firm and holds the shape.
Step 7: Fold the Entire Figure in Half
Now fold the entire penguin figure in half along the existing center crease, with the wings on the outside. This gives your penguin its three-dimensional shape.
At this point, your penguin should start to take shape and look like a bird standing upright.
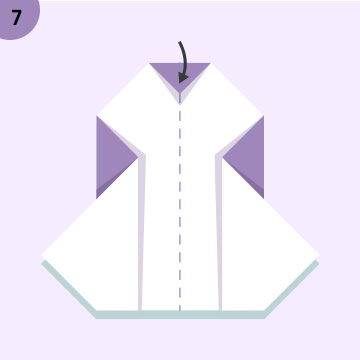
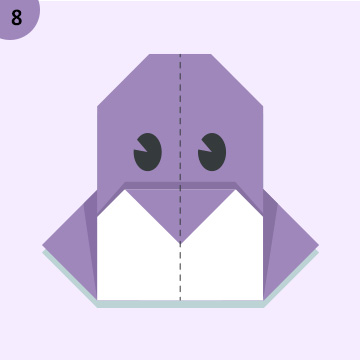
Step 8: Make the Beak and Adjust the Shape
To give your penguin a beak, simply fold a small part of the top tip forward—this is the pointed part of the head you folded earlier. Adjust it as you like to make the beak more or less pronounced.
If you wish, you can also fold out the wings slightly to make the penguin look more lifelike.
Finally, draw two small eyes with a black pen or marker on the white face area.
Congratulations! You’ve just completed your easy origami penguin in 8 simple steps.
Bonus Tips for a Better Origami Penguin
- Use origami paper: This paper is thinner and folds more cleanly, which helps make precise folds and sharper edges.
- Try different sizes: Making penguins in different paper sizes creates a fun little penguin family!
- Add color and details: Decorate your penguins with bowties, scarves, or hats using colored markers or cut-out paper.
- Turn it into a magnet or decoration: Attach a small magnet to the back for a fridge decoration, or glue it to a card for a handmade touch.
Why Origami Penguins Are Great for Beginners
- Simple folds: Unlike cranes or dragons, penguins require only basic folds.
- Recognizable and fun: Even beginners will end up with a recognizable and adorable animal.
- Great for kids: It’s a kid-friendly project that teaches patience, precision, and creativity.
Origami helps build fine motor skills and improves concentration—making it a great activity for people of all ages.
Frequently Asked Questions
Q: What if I don’t have origami paper?
A: No problem! You can use any square sheet of paper. If you only have rectangular paper, simply trim it into a square before starting.
Q: Can I use colored markers to decorate?
A: Absolutely! Adding eyes, wings, or even little snowflakes around your penguin can turn it into a festive winter craft.
Q: Can kids make this origami penguin?
A: Yes! With adult supervision for younger children, this is a perfect origami project for kids aged 6 and up.
Final Thoughts
Making an easy origami penguin is a delightful way to dip your toes into the world of paper folding. With just 8 simple steps, you can transform a plain square of paper into a charming little penguin that’s perfect for decorations, gifts, or just for fun.
Whether you’re folding solo, teaching a class, or crafting with your children, origami penguins are guaranteed to bring a smile. Try it today and explore more creative origami animals to add to your collection!


