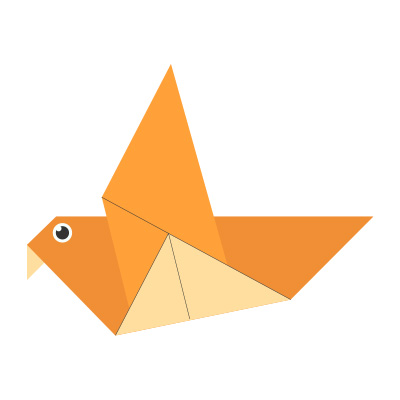
How To Make An Easy Origami Pigeon 10 Step by Step Instructions
Origami, the ancient Japanese art of paper folding, continues to captivate people of all ages. Among the many origami designs, the origami pigeon is one of the most elegant and symbolic creations. Whether you’re a beginner or simply looking for a fun craft project, this guide will show you how to make an easy origami pigeon in 10 step-by-step instructions. With just a square piece of paper and a bit of patience, you’ll have your very own paper pigeon in no time!
Why Make an Origami Pigeon?
The pigeon, often seen as a symbol of peace and communication, makes for a meaningful origami project. It’s perfect for school projects, gifts, decorations, or just a calming afternoon activity. Unlike more complex origami animals, this easy origami pigeon is beginner-friendly and doesn’t require any special tools or skills.
Materials You’ll Need
Before diving into the steps, gather the following:
- 1 square sheet of paper (preferably origami paper, 6×6 inches or larger)
- A flat surface to fold on
- Optional: bone folder or ruler for crisper creases
Origami Art and Craft Materials on Amazon
How To Make An Easy Origami Pigeon – 10 Step by Step
Step 1: Start with a Square Paper
Place your square paper color side up (if applicable). Fold it in half diagonally to form a triangle. Crease well and then unfold. Now fold it diagonally the other way and crease again. These folds help you align future steps properly.

Step 2: Fold Into a Triangle
Fold the paper diagonally again to make a triangle and keep it folded this time. This is your base for the pigeon.

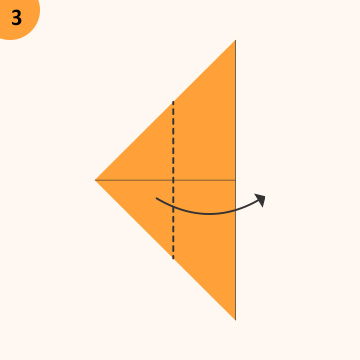
Step 3: Fold the Triangle in Half Vertically
Take the left corner and fold it over to the right corner, creating a smaller triangle. Press down the fold and then unfold. This is a guide crease for the next step.
Step 4: Create the Pigeon’s Head Base
With the triangle’s flat side at the top, fold the right corner up toward the top point. Repeat the same fold with the left corner. These folds create small flaps on each side, are the start of the pigeon’s wings.

Step 5: Fold Down the Top Corner
Now, fold the top corner of the triangle down just a little bit, about a half-inch. This will become the pigeon’s head in later steps.

Step 6: Fold the Triangle in Half Horizontally
Fold the entire shape in half by bringing the bottom point up to the top. You should now have a shape resembling a narrow kite. Make sure all layers are aligned before creasing.

Step 7: Form the Head
At the narrow end (where the small corner was folded down earlier), fold a tiny portion of the tip downward. This small flap becomes the pigeon’s beak. Press the crease firmly.

Step 8: Fold Down the Wings
Now take the top flap on each side and fold it down at an angle to form the wings. Adjust the angles to your liking so the wings are symmetric and bird-like.

Step 9: Adjust the Neck and Tail
Slightly bend the neck forward so it looks natural, and lift the tail end up a bit to complete the body posture of the pigeon.

Step 10: Final Touches and Shape Adjustments
Open the wings slightly for a 3D effect. Flatten or reshape any folds that look uneven. If you’d like, draw eyes on the head with a pen or marker.

Tips for Best Results
- Use thinner paper for easier folds, especially if you’re new to origami.
- Practice on scrap paper first if you’re worried about messing up.
- Make sure all creases are sharp; this helps the pigeon hold its shape better.
- Try using dual-color paper for a beautiful contrast between the wings and body.
Fun Ways to Use Your Origami Pigeon
Once you’ve mastered the easy origami pigeon, here are some creative ways to use it:
- Peace-themed decorations: Hang several pigeons using string to create a peaceful mobile.
- Greeting cards: Glue your pigeon onto a folded card and add a personalized message.
- Classroom crafts: Great for teaching kids about symbols of peace and communication.
- Table décor: Use origami pigeons as elegant, minimalist table pieces for events.
Common Mistakes and How to Avoid Them
1. Paper tearing:
Avoid using overly stiff or thick paper. Origami paper is ideal for clean folds without tearing.
2. Crooked folds:
Take your time aligning edges precisely. Rushing leads to asymmetry and imbalance in the final shape.
3. Wings not staying in place:
Ensure your wing folds are angled properly and press creases firmly so the wings stay up.
FAQs: Easy Origami Pigeon
Q: Can I use A4 paper to make an origami pigeon?
A: Yes, but you’ll need to cut it into a perfect square first. A square is essential for proper symmetry in origami.
Q: Is origami good for kids?
A: Absolutely! It helps develop fine motor skills, patience, and creativity. This 10-step pigeon is simple enough for children with some supervision.
Q: How long does it take to fold one pigeon?
A: On average, it takes 5–10 minutes, depending on your experience level.
Final Thoughts
Learning how to make an easy origami pigeon in 10 step-by-step instructions is a rewarding experience. Not only do you create something beautiful with just a piece of paper, but you also connect with a centuries-old art form that values mindfulness, precision, and creativity. Whether you’re folding alone or with family and friends, this simple craft brings joy and elegance into any space.
So grab a sheet of paper, follow these ten easy steps, and fold your way to a peaceful origami pigeon today!