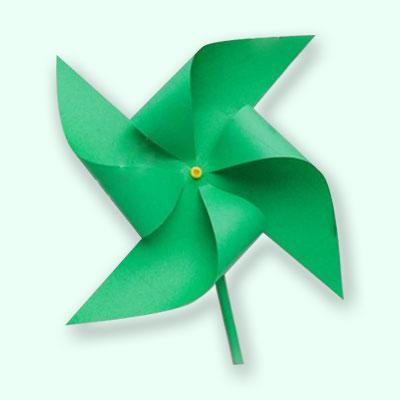
How To Make An Easy Origami Pinwheel 6 Step by Step – How to Make a Windmill, How to Fold Origami Windmill, Origami Windmill for Kids
Looking for a fun and creative paper craft that’s easy enough for kids and engaging enough for adults? Learning how to make an origami pinwheel, also known as a paper windmill, is a fantastic place to start! This colorful spinning decoration is perfect for school projects, party decorations, or simply a weekend activity with the family. In this guide, we’ll walk you through how to make an easy origami pinwheel in 6 step-by-step instructions. Whether you’re folding for fun or teaching kids about the power of wind, this origami windmill is a delightful craft project.
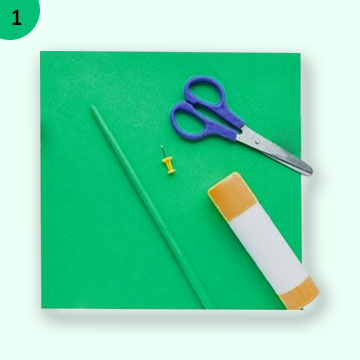
What You Need to Make an Origami Pinwheel
Before diving into the step-by-step instructions, gather the materials you’ll need. The beauty of this craft lies in its simplicity; you likely already have everything at home!
Materials:
- One square sheet of paper (15cm x 15cm is ideal)
- A pencil or straw (for mounting)
- A push pin or thumbtack
- Scissors (for making precise cuts)
- Glue (optional)
- Small bead (optional, helps with spinning)
Origami Art and Craft Materials on Amazon
Step-by-Step: How to Make an Easy Origami Pinwheel
Follow these 6 simple steps to fold your own origami windmill. This method is easy to follow and suitable for kids, beginners, and anyone new to the art of origami.
Step 1: Start with a Square Piece of Paper
To begin, choose a square piece of paper. You can use origami paper, craft paper, or even recycled paper; just make sure it’s perfectly square. Bright colors or double-sided patterns add a nice visual effect when the pinwheel spins.
Lay the paper flat on your work surface with the side you want to show on the outside facing down.
Step 2: Fold Diagonally Both Ways
Fold your square diagonally from one corner to the opposite corner. Crease it well and unfold. Then fold the opposite diagonal and crease again. You should now have an “X” crease across your paper.
This is a crucial step that helps align the cuts and folds in the later stages.

Step 3: Cut Along the Creases Toward the Center
Using scissors, carefully cut along each diagonal crease, but stop about 1 inch (2.5 cm) before you reach the center. You’ll make four cuts in total. Do not cut to the center, or the pinwheel will fall apart.
This step prepares the blades of your windmill.

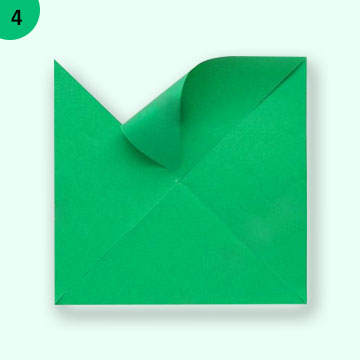
Step 4: Fold Every Other Corner Toward the Center
Now comes the exciting part: creating the windmill’s spinning blades. Pick one corner from each triangle created by your cuts and fold it toward the center of the square. It’s important to choose the same side of each triangle (either all right-hand or all left-hand corners) to maintain symmetry.
Hold down the points in the center and make sure they slightly overlap. You can use a dot of glue to secure them temporarily if needed.
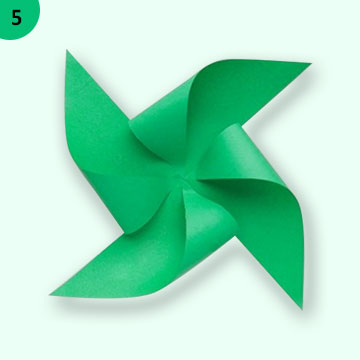
Step 5: Secure the Center with a Push Pin
To hold the blades together and allow the pinwheel to spin, take a push pin and carefully push it through the center where all the folded tips meet. Make sure it goes through all the layers of paper.
Then, insert the pin into the eraser of a pencil, or stick it into the end of a straw or wooden skewer. For better spinning action, add a small bead between the paper and the mounting stick to reduce friction.
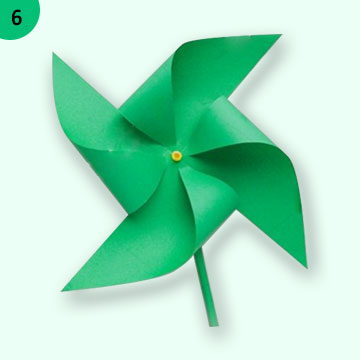
Step 6: Test and Enjoy Your Origami Windmill
Blow gently on your origami pinwheel or take it outside to see it spin in the breeze! If it doesn’t spin well, loosen the pin slightly or adjust the angle of the folded corners.
Congratulations! You’ve now made a beautiful and functional origami pinwheel in just six easy steps.
Origami Windmill for Kids: Fun and Educational
Creating an origami windmill is more than just a craft, it’s a hands-on learning experience. Children can learn:
- Basic geometry and symmetry
- Fine motor skills through folding and cutting
- Science concepts like wind power and air resistance
You can even turn it into a STEM project by attaching the pinwheel to a moving base or using it in a simple wind turbine experiment!
Creative Variations of the Origami Pinwheel
Once you’ve mastered the basic origami windmill, why not experiment with different designs and sizes?
Try These Fun Variations:
- Use patterned paper or decorate with markers and stickers
- Double layer pinwheels for a fuller, flower-like look
- Mini pinwheels for party favors or cake toppers
- Jumbo pinwheels for party props or wall decor
You can even attach multiple pinwheels to string and create a spinning mobile!
Safety Tips When Crafting with Kids
While making origami windmills is generally safe, a few precautions ensure a fun and injury-free experience:
- Supervise young children when using scissors and pins
- Use child-safe scissors and rounded push pins
- Keep small beads away from toddlers (choking hazard)
Conclusion: A Whirl of Fun with Paper!
Learning how to make an easy origami pinwheel is a wonderful introduction to paper folding. This six-step origami windmill is quick, colorful, and educational, a fantastic project for kids and adults alike. From classrooms to home crafts, origami windmills offer fun, creativity, and even a bit of science!
Next time you need a rainy-day activity, a DIY party decoration, or a cool craft idea, you’ll know how to fold an origami windmill in just 6 simple steps. So grab your paper, catch the breeze, and let your creativity spin!
Keywords Used: how to make an easy origami pinwheel, how to make a windmill, how to fold origami windmill, origami windmill for kids, origami pinwheel step by step, paper windmill DIY