
How To Make An Easy Origami Rabbit: 13 Step-by-Step Instructions
Origami, the ancient Japanese art of paper folding, is not only fun but also a great way to boost creativity and mindfulness. Whether you’re a beginner or an enthusiast, learning how to make an easy origami rabbit is both enjoyable and rewarding. In this tutorial, we’ll walk you through 13 simple steps to craft a charming origami bunny using just a square sheet of paper.
Let’s hop right in!
Materials You’ll Need
Before you begin, gather the following:
- A square sheet of paper (preferably 6×6 inches)
- A flat surface for folding
- Optional: Colored paper or markers to decorate your rabbit
Tip: Thinner paper is easier to fold and works best for beginners.
Origami Art and Craft Materials on Amazon
Step-by-Step Guide to Make an Easy Origami Rabbit
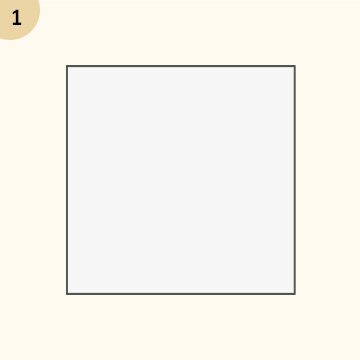
Step 1: Start with a Square Paper
Place your square paper on the table with the colored side (if any) facing down. Position it like a diamond, one corner pointing up.
Step 2: Fold Diagonally
Fold the paper in half diagonally by bringing the bottom corner up to meet the top corner. Crease the fold well and then unfold it. You should now see a visible diagonal crease line.
Step 3: Fold Diagonally the Other Way
Now fold the paper diagonally again, this time bringing the left corner over to the right corner. Crease and unfold. You should now have an “X” crease pattern on the paper.
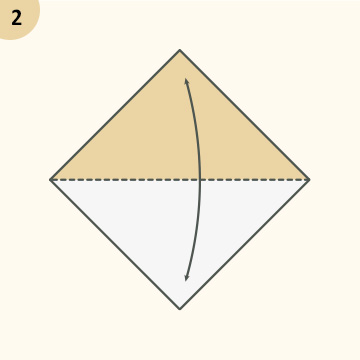
Step 4: Fold the Bottom Corner to the Top
Take the bottom corner of your square and fold it up to the top corner to create a triangle. This time, don’t unfold.
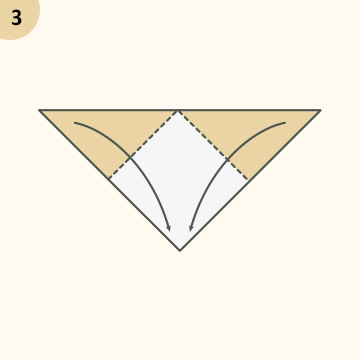
Step 5: Fold the Left Corner to the Top
Take the left corner of the triangle and fold it up to the top corner, aligning the edges. Crease firmly.
Step 6: Fold the Right Corner to the Top
Repeat the same with the right corner. You should now have a diamond shape with flaps on both sides.
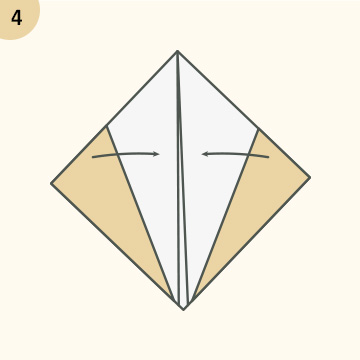
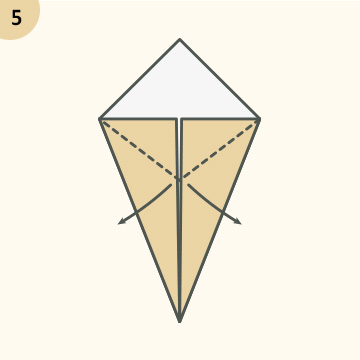
Step 7: Fold the Left and Right Edges to the Center
Take the left edge and fold it toward the centerline. Do the same with the right edge. These folds will form the rabbit’s body and ears.
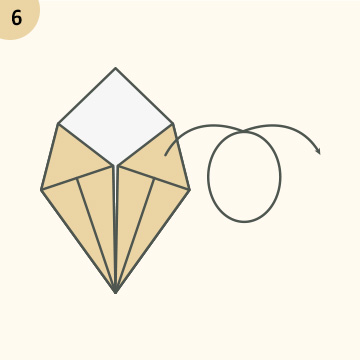
Step 8: Flip the Paper Over
Carefully flip your folded paper to the other side. Now the pointed tip should be facing downwards.

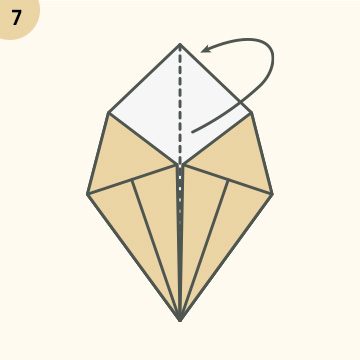
Step 9: Fold the Bottom Tip Up
Fold the bottom tip up to just above the middle of the diamond. This is going to form the rabbit’s tail.
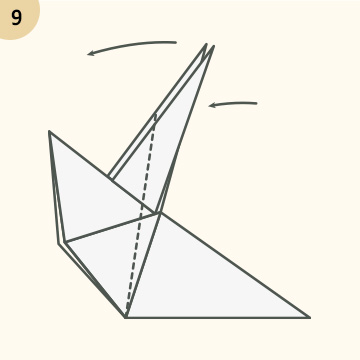
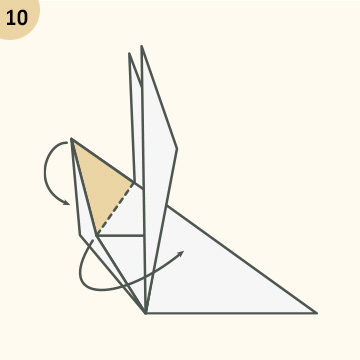
Step 10: Fold the Whole Shape in Half Vertically
Now fold the entire shape in half vertically from left to right. You should start seeing the shape of a bunny forming.
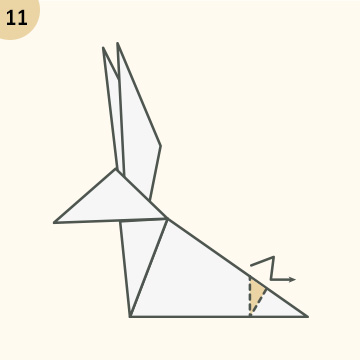
Step 11: Fold the Nose Down
At the top of your folded shape, you’ll see a pointed tip, this will be the rabbit’s nose. Gently fold it down slightly to create a rounded snout.
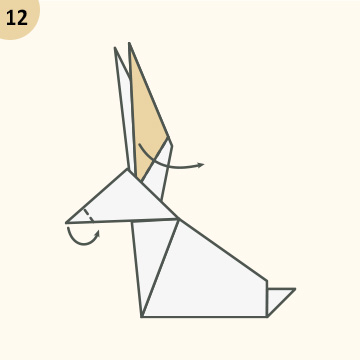
Step 12: Fold the Ears Forward
On the top side, you’ll see two flaps, these are the bunny’s ears. Gently pull them forward and slightly separate them so they stand upright.
Step 13: Shape the Tail and Final Touches
Look at the back of the rabbit. You’ll see the small flap that was folded up earlier. Slightly puff it out to make a small tail. Use your fingers to gently round or angle the edges for a more realistic shape.
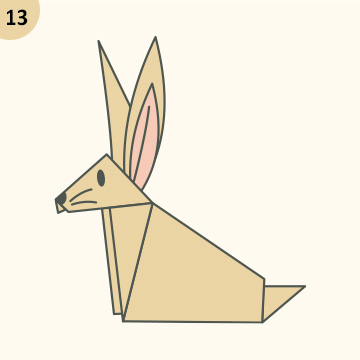
Congratulations! You’ve just created an adorable origami rabbit in 13 easy steps!
Customize Your Origami Rabbit
Now that you’ve folded your rabbit, consider adding some personal touches:
- Draw eyes and whiskers with a black marker
- Use colored or patterned paper for extra flair
- Create a whole family of rabbits in different sizes and colors
- Add a cotton ball for the tail for a 3D effect
Origami rabbits make great decorations for Easter, spring festivals, kids’ crafts, or even gift toppers.
Benefits of Making Origami
Making origami isn’t just a fun hobby; it offers several benefits:
- Improves focus and concentration
- Boosts hand-eye coordination
- Encourages creativity and spatial awareness
- Acts as a calming, meditative activity
- Great for kids and adults alike
Common Mistakes to Avoid
While folding your origami rabbit, keep these tips in mind:
- Don’t rush the folds; precision matters
- Always crease firmly for better structure
- Start with larger paper if you’re a beginner
- Avoid thick or stiff paper it makes folding harder
Final Thoughts
Learning how to make an easy origami rabbit is a perfect beginner-friendly craft. With just one piece of paper and a bit of patience, you can bring a paper bunny to life in minutes. Follow these 13 step-by-step instructions, and you’ll soon be folding rabbits for fun, décor, or gifting.
Whether you’re crafting with kids, relaxing on a Sunday afternoon, or trying a new hobby, origami is a delightful way to create something charming and handmade.


