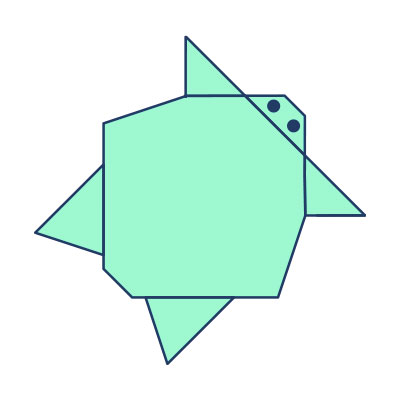
How To Make An Easy Origami Turtle 11 Step by Step
Origami, the ancient Japanese art of paper folding, is a fun and relaxing hobby for all ages. Among the many charming creations you can fold, the origami turtle is a delightful and simple project to try. Whether you’re a beginner or just looking for a creative activity, this easy origami turtle tutorial will guide you through 11 step-by-step instructions to make your own paper turtle in no time.
In this guide, we’ll cover everything you need, from materials to detailed folding techniques. Let’s dive in!
What You’ll Need
Before we start the folding process, make sure you have the following:
- 1 square sheet of paper (preferably green, 6×6 inches or any size you prefer)
- A flat surface for folding
- Optional: A black pen or marker for adding eyes
No glue, scissors, or special tools required, just your hands and a little patience!
Origami Art and Craft Materials on Amazon
Why Make an Origami Turtle?
Origami turtles are not only cute, but they also symbolize patience, endurance, and wisdom in many cultures. Making one can help improve your focus, enhance your creativity, and offer a calming break from your busy day.
Whether you’re making it for fun, as a gift, or for a craft project, learning how to make an origami turtle step by step is a rewarding experience.
How To Make An Easy Origami Turtle in 11 Steps
Step 1: Start With a Square Sheet of Paper
Place your paper color side down (if using colored paper). Ensure the edges are straight and crease-free before starting.
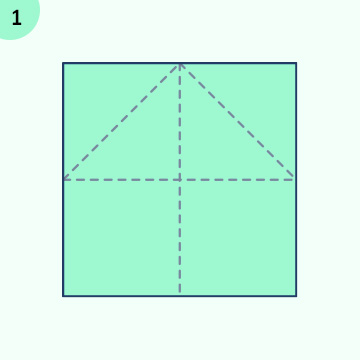
Step 2: Fold the Paper Diagonally
Fold the square diagonally to form a triangle. Press down the crease sharply, then unfold. Repeat the same in the opposite direction. This will create an “X” crease pattern.
Step 3: Fold the Paper Horizontally and Vertically
Now fold the paper in half vertically and horizontally. Unfold again. You should now have a grid of creases dividing the square into 8 equal triangular sections.
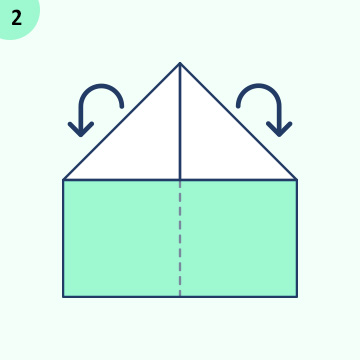
Step 4: Collapse Into a Waterbomb Base
Using the creases you’ve made, pinch the sides and collapse the paper into a waterbomb base (a triangle shape with two flaps on each side). This is a common origami base and forms the body of the turtle.
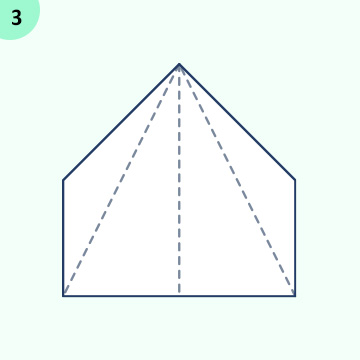
Step 5: Fold the Bottom Corners Upward
Take the two bottom corners of the triangle and fold them up to meet the top point. This will create a diamond shape. These flaps will become the turtle’s legs later.
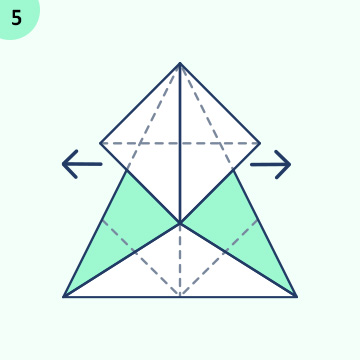
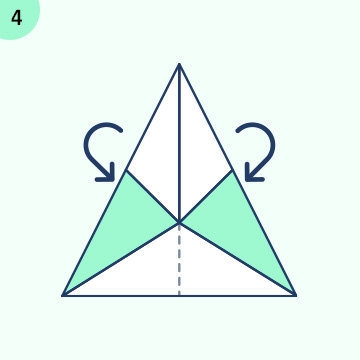
Step 6: Fold the Side Corners Inward
Next, fold the left and right corners inward toward the center crease. This step gives structure to the turtle’s shell and legs.
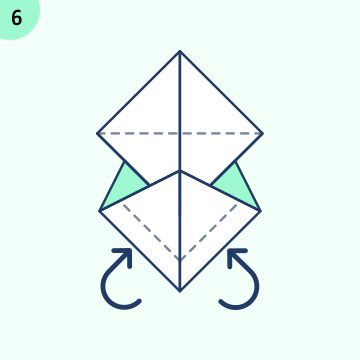
Step 7: Create the Turtle’s Head
Now, take the top point of the diamond (the top flap) and fold it downward just slightly, about 1/3 of the way. Then fold it back upward, leaving a small portion folded down. This reverse fold creates the turtle’s head and neck.
Step 8: Form the Turtle’s Tail
At the bottom point of the diamond, fold the tip upward slightly. This will be the tail of your origami turtle. You can adjust how long or short you want the tail to be.

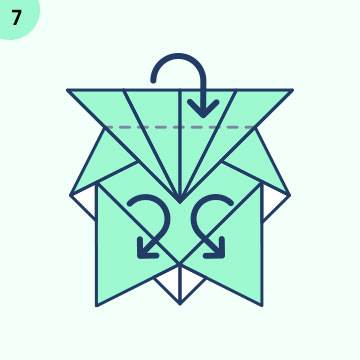
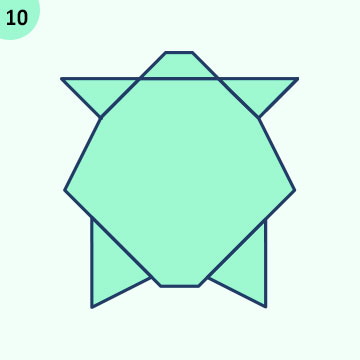
Step 9: Shape the Legs
Unfold the side corners a little, then fold the outer edges diagonally to shape the front and back legs. Make sure they’re symmetrical for a neat look.
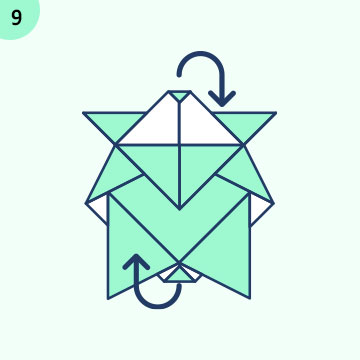
Step 10: Add Details to the Shell
For extra flair, fold the sides of the shell slightly inward to create a more rounded, turtle-like shell. You can also create gentle curves on the paper for a 3D effect.
Step 11: Draw Eyes and Final Touches
Use a marker or pen to draw two tiny eyes on the head. Feel free to add lines or dots to the shell to resemble a real turtle’s back.
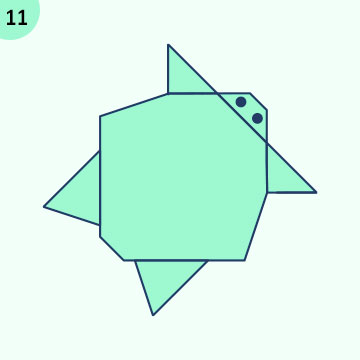
Congratulations! You’ve now completed your easy origami turtle in 11 steps.
Tips for Better Results
- Use thin origami paper for easier folding and cleaner creases.
- Be precise with your folds, alignment makes a big difference in the final appearance.
- If you’re teaching kids, you can use larger sheets of paper to make the steps easier to follow.
- Decorate your turtle with stickers, patterns, or colored pencils for a personalized touch.
Fun Ideas for Your Origami Turtle
Once you’ve mastered the origami turtle, here are a few creative ways to use it:
- Greeting cards: Glue the turtle onto a card for a handmade look.
- Classroom projects: Great for teaching kids about sea creatures or origami basics.
- Home decor: Display your origami turtle on a shelf or in a shadow box.
- Party favors: Create a few turtles in different sizes and colors for party decorations.
You can also combine your turtle with other origami animals like frogs, fish, or dolphins for a full ocean-themed display.
Frequently Asked Questions
Q: Can I use regular printer paper for origami?
Yes, you can use printer paper as long as you cut it into a perfect square. However, origami paper is thinner and often easier to fold, especially for beginners.
Q: Is this turtle model suitable for kids?
Absolutely! With adult supervision, children as young as 7 can follow this 11-step origami turtle tutorial with ease.
Q: What if I make a mistake while folding?
Don’t worry, origami is all about practice. If something doesn’t look right, simply unfold and try again. Each mistake is a learning step.
Final Thoughts
Now that you know how to make an easy origami turtle step by step, you have a new skill that’s both fun and relaxing. Origami teaches patience, precision, and creativity, and this charming turtle is a great addition to your collection.
Whether you’re a beginner or an experienced paper folder, this 11-step guide helps you master the art of the origami turtle in just a few minutes. So grab your square paper, follow the steps, and enjoy crafting your very own paper pet turtle!